With the PC on and using the included cable, connect the LabJack U12 to the USB port on the PC or USB hub. The USB cable provides power and communication for the LabJack U12. The status LED should immediately blink 4 times (at about 4 Hz), and then stay off while the LabJack enumerates.
Enumeration is the process where the PC’s operating system gathers information from a USB device that describes it and it’s capabilities. The low-level drivers for the LabJack U12 come with Windows and enumeration will proceed automatically. The first time a device is enumerated on a particular PC, it can take a minute or two, and Windows might prompt you about installing drivers. Accept all the defaults at the Windows prompts, and reboot the PC if asked to do so. The Windows Installation CD might also be needed at this point. Make sure a CD with the correct version of Windows is provided. Enumeration occurs whenever the USB cable is connected, and only takes a few seconds after the first time.
When enumeration is complete, the LED will blink twice and remain on. This means Windows has enumerated the LabJack properly.
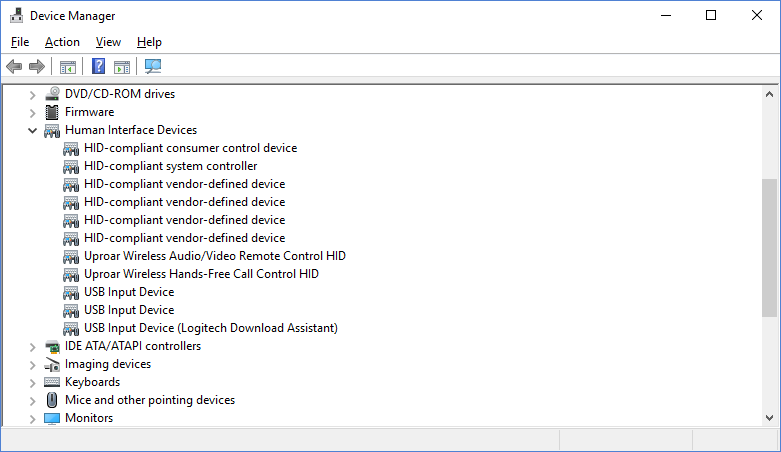
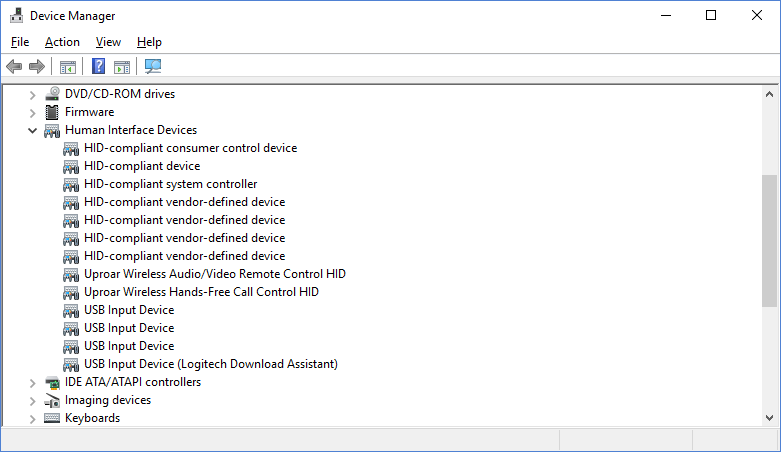
The U12 enumerates as an HID (Human Interface Device). Following are screenshots from Windows Device Manager with no U12 connected and with 1 U12 connected.


The exact entries can vary with different versions of Windows, but in the above Windows 10 screenshot connecting 1 U12 gives us 2 entries under Human Interface Devices: "HID-compliant device" and "USB Input Device". Right-click on either of these, choose Properties, go to the Details tab, set Property = Hardware Ids, and you will see the LabJack USB vendor ID of 0x0CD5.
If the U12 fails to enumerate:
-
Make sure you are running Windows OS version 4.10.2222 or higher.
-
Try connecting the U12 to another PC.
-
Try connecting a different USB device to the PC.
-
See the USB Communication Failure application note.
