Microphones (App Note)
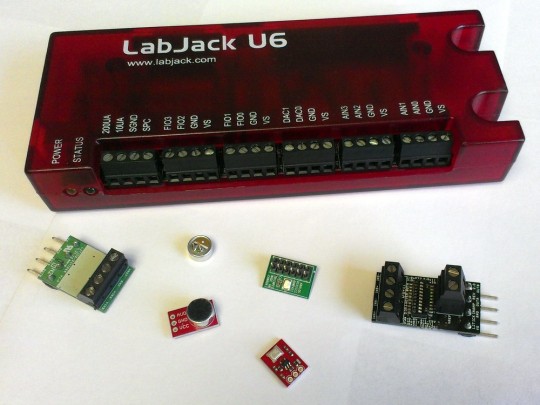
Most microphones present unique challenges when compared with traditional analog output sensors. The output of a typical mic is very low voltage, and high frequency, thus making it difficult to measure.
Electret Microphones
Electret microphones are inexpensive, and use a simple dielectric material to detect the sound, but you need to amplify the output signal. As shown in Figure 1, the microphone requires a bias resistor that you connect to a voltage source, and also requires a series capacitor to remove the DC offset. The small signal that results would need to go through amplification and then into an analog input on the U3/U6/UE9/T4/T7.
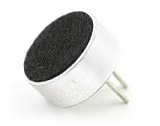
Figure 1a: Electret Microphone
If you are using a different amplifier than the LJTick-InAmp, be sure to reference the amp datasheet for wiring details. Sometimes a resistor on the order of 47kΩ between GND and the inputs is required to get a good signal.
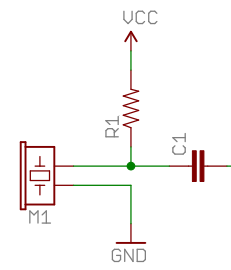
Figure 1b. Electret Microphone Typical Circuit
R1 = 680Ω to 5kΩC1 = 1µF to 5µF
The output from the circuit shown in figure 1 will not provide sufficient voltage for a LabJack device to detect common sounds, like talking, because even high volume noises like PC speakers on full-volume only produce a few µV without amplification. Due to the very low output voltage, we recommend amplifying the signal by using either a LJTick-InAmp, or a circuit like figure 4.
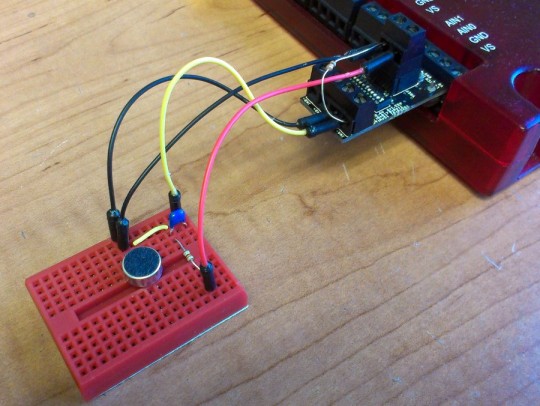
Figure 2. Electret mic wired to an LJTick-InAmp, and LabJack U6
When set to a gain of 201, the output signal from the LJTick-InAmp is on the order of 700mV for someone talking about 2ft away from the electret mic. To measure the sound level it's useful to use LJStreamUD or LJLogUD software. Remember that audio signals are high frequency, so to get an accurate waveform you will need to sample quickly with streaming (30kHz will look pretty good). If you simply need max. amplitude (volume), then you can sample the analog input at much lower speeds, like 1000Hz, or 1mS intervals. Notice the mic output is tied through a 100k resistor to GND on the LJTick-InAmp, this weak pull-down resistor is to keep the voltage from floating up to a rail.
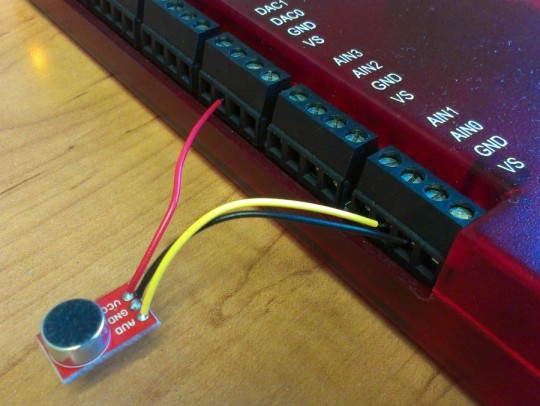
Figure 3. Electret mic with included OPA344, wired to a U6. Sparkfun Electret Microphone Breakout
This inexpensive electret mic includes a OPA344, and is tuned for detecting conversational volumes and frequencies. It produces a nice waveform with an amplitude of about 1.2V when talking 2ft away. It is powered using DAC0 set to 4-5V because DAC0 is not as noisy as the VS lines, so the output signal is cleaner. The schematic for this Sparkfun product is shown in figure 4 below.
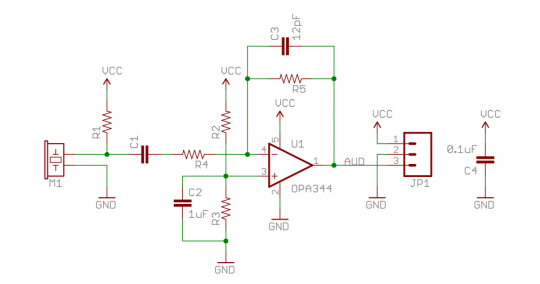
Figure 4. Electret mic amplified
R1 = 680Ω to 5kΩC1 = 1µF to 5µFR2, R3 = 10kΩ to 50kΩR4 = 10kΩ to 50kΩR5 = 100kΩ to 1MΩC2 = 0.1µF to 1µFC3 = 10pF to 100pF
If constructing your own amplification circuit, the schematic shown in Figure 4 is a good starting point.
To measure sound pressure (volume only), the circuit can be modified to produce a voltage that is easier to interpret.
MEMS Microphones
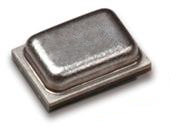
Figure 5a: MEMs Microphone
MEMS microphones use a different technology to detect sound than do Electret mics. They have a micro diaphragm which picks up the sound, and they have a much smaller form factor than electret mics. Unfortunately, if the MEMS mic outputs an analog signal, it will typically require some preamplification before the LabJack device. It's possible to purchase an LJTick-InAmp for amplification, or construct your own.Due to their small form factor, MEMS microphones are used in compact devices like cell phones and tablets.
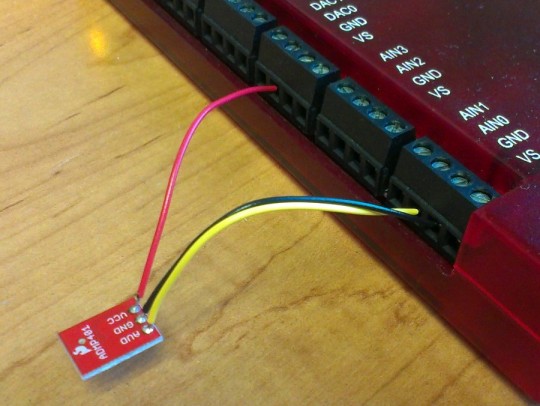
Figure 5b. MEMS mic with included OPA344 wired to a LabJack U6. Sparkfun MEMS Microphone Breakout
The MEMS microphone breakout board is connected in the same way as the electret mic shown in figure 3. Power the device using a DAC line set to 4-5V, and wire the AUD output to AIN0.
The MEMS mic was superior to the electret mic in terms of sensitivity, and it seemed to provide a cleaner signal. Overall, the output was about 1.4V for talking 2ft away from the mic.
There are also digital MEMS microphones, but LabJack devices do not have an easy way to interface with this kind of mic. A typical digital mic will require a high frequency clock(~2.4MHz), and it will output a pulse-density modulated (PDM) output. Digital mics are typically wired to a fancy audio codec chip which converts the audio stream into a well known format that can be read by a modern computer.
Conclusion
If you already have an LJTick-InAmp, it can provide adequate amplification for electret and analog MEMS microphones, but if you plan to purchase a microphone, it's best to get something with built-in amplification suited to your needs. Most microphone boards will explain something about the frequency and volume range for which they are suitable, so just pick the one that works for your application. If you are trying to make something for low cost, it's possible to construct the amplification circuit shown in figure 4, but it might require some tweaking to get the values right.
LabJack devices are not readily compatible with digital microphones, so stick to mics with analog outputs.
