1. Install the appropriate LabJack driver and software bundle.
The installer covers UD devices (U3, U6, UE9) and LJM devices (T-series, Digit), so not all installed applications will work with the T8. The following applications work with the T8:
-
Kipling,
-
LJLogM, and
-
LJStreamM.
Only run 1 application at a time.
If there is an installation problem, see the Windows Installer Troubleshooting (App Note).
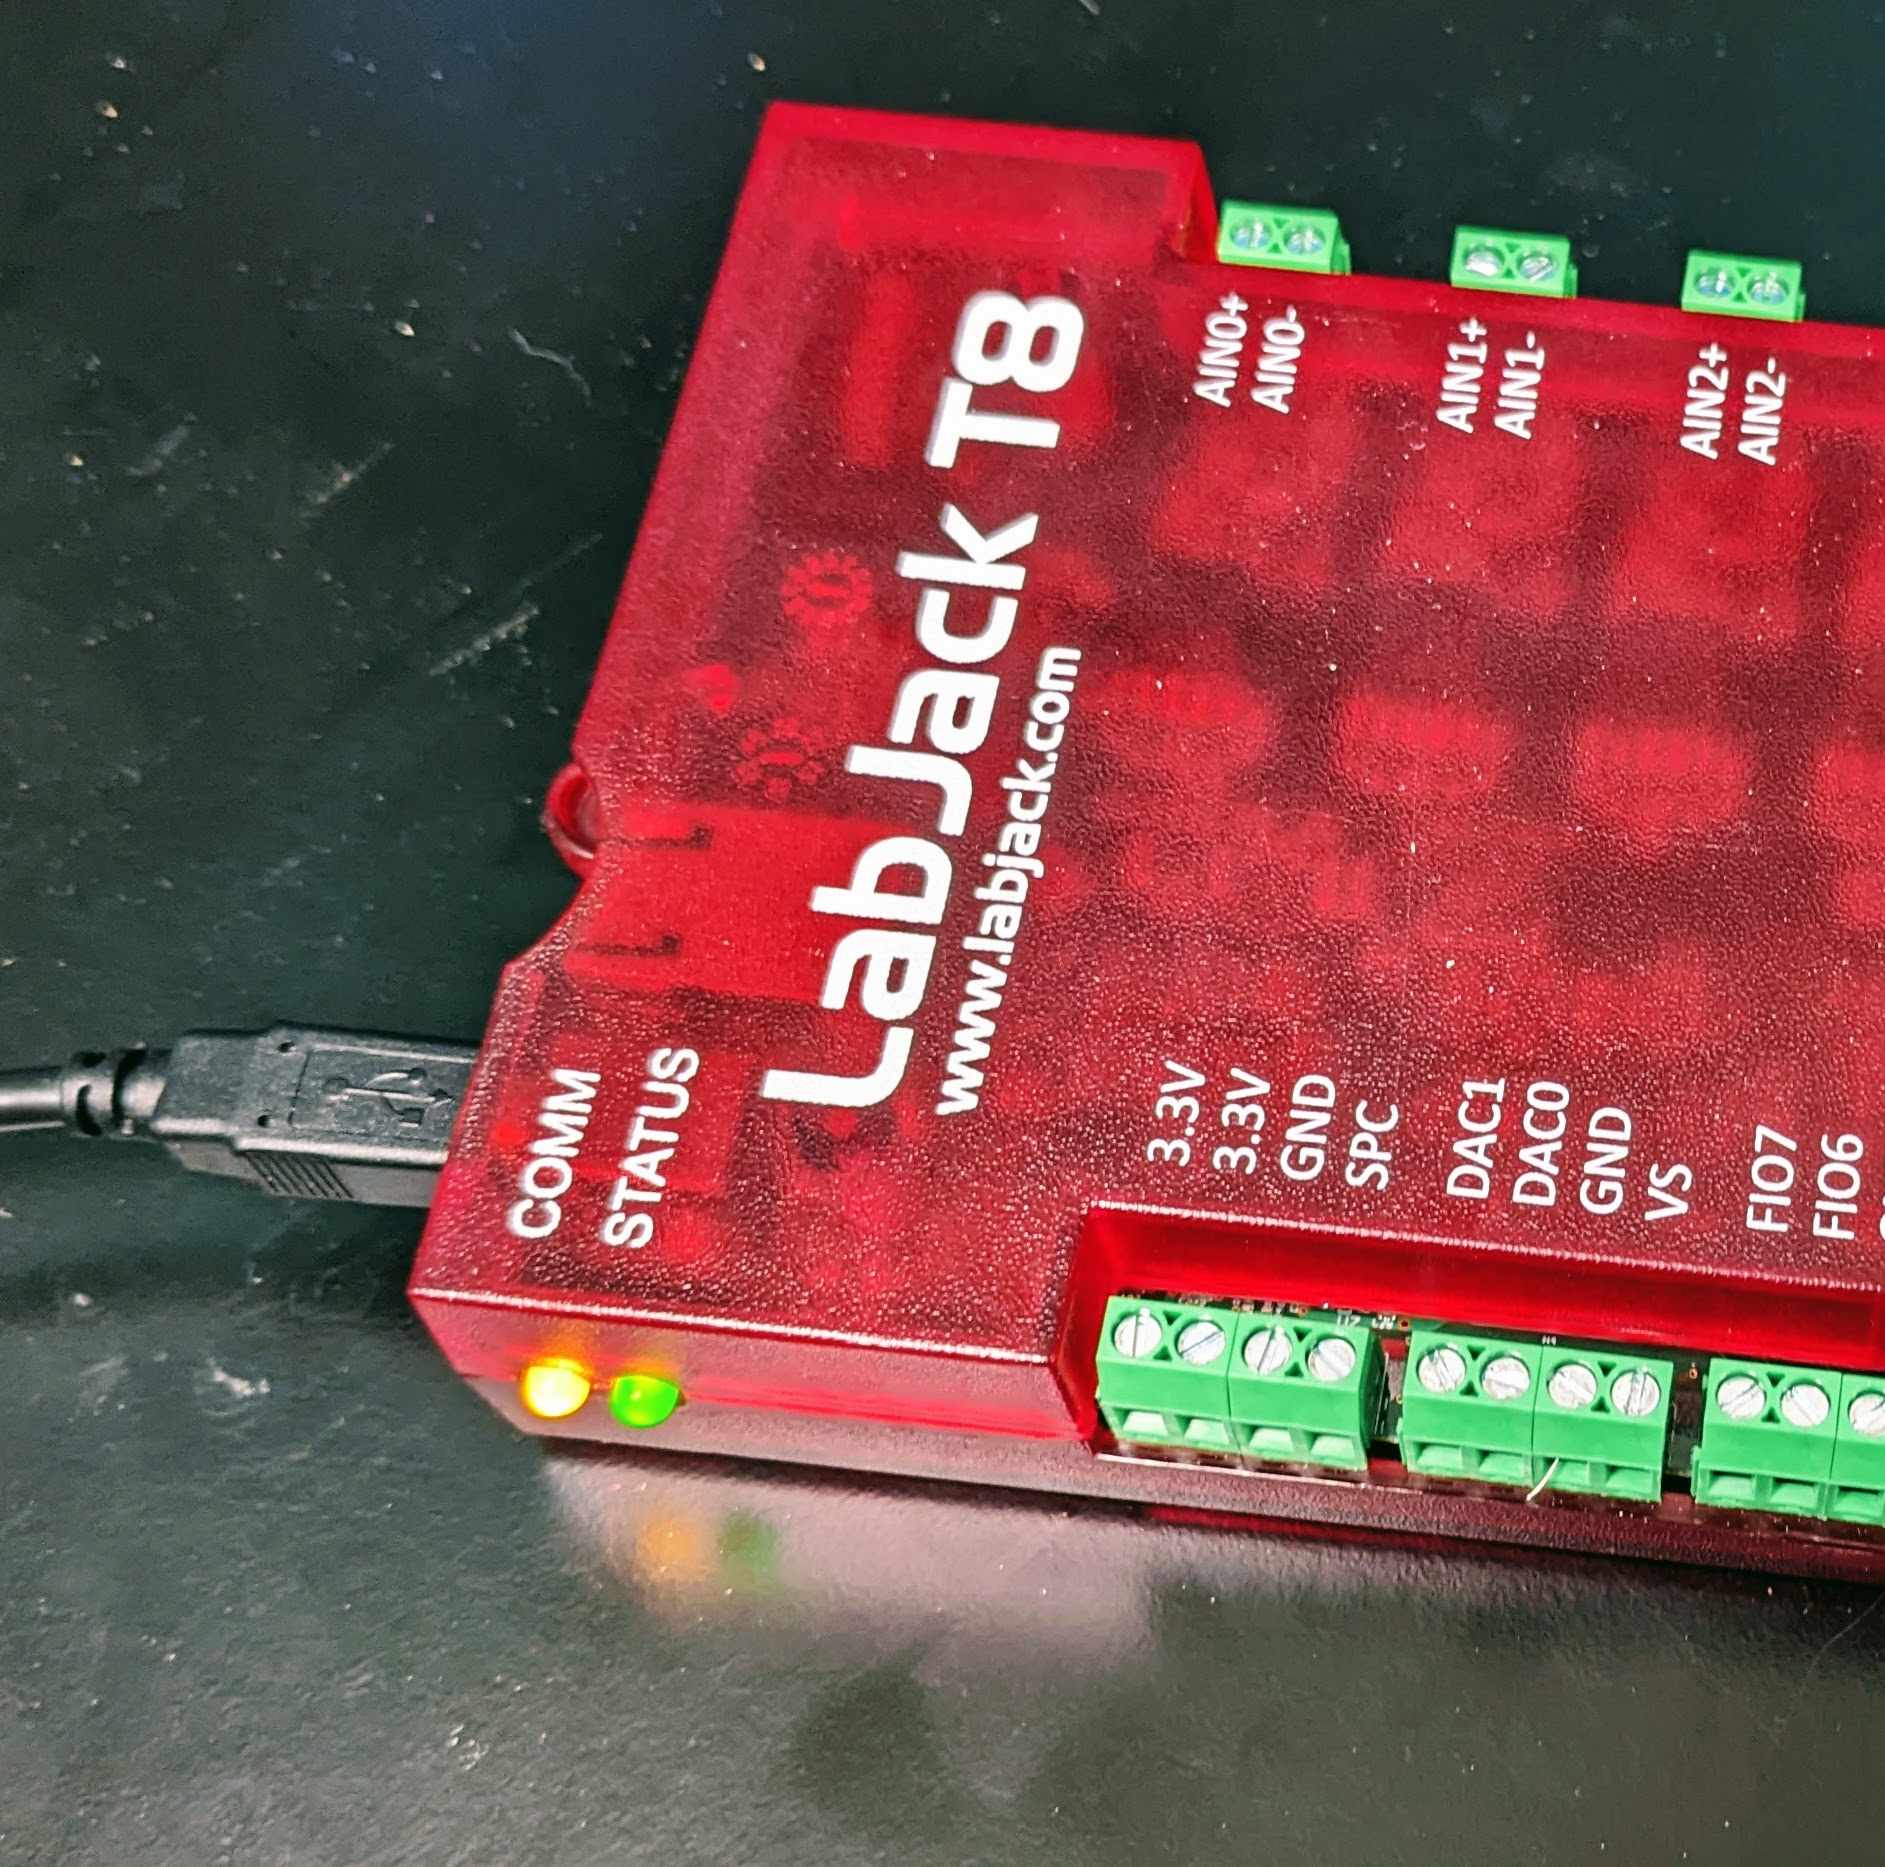
2. Connect the T8 to the computer or hub via USB.
The status LED should blink at power up and then stay solid on to indicate successful enumeration. If Windows asks about installing new hardware accept the defaults. If the device does not enumerate seethe USB Communication Failure App Note.
3. Run Kipling.
Kipling is a free application installed along with the driver. You should be able to find it in the Start Menu links.
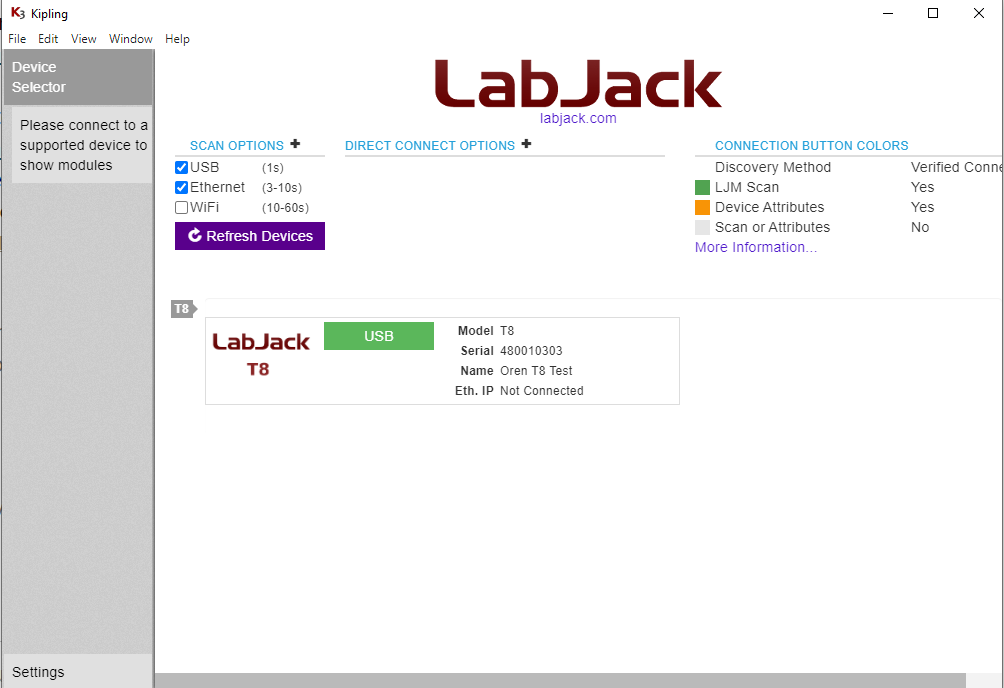
4. Click "Refresh Devices" if the desired connection is not listed.
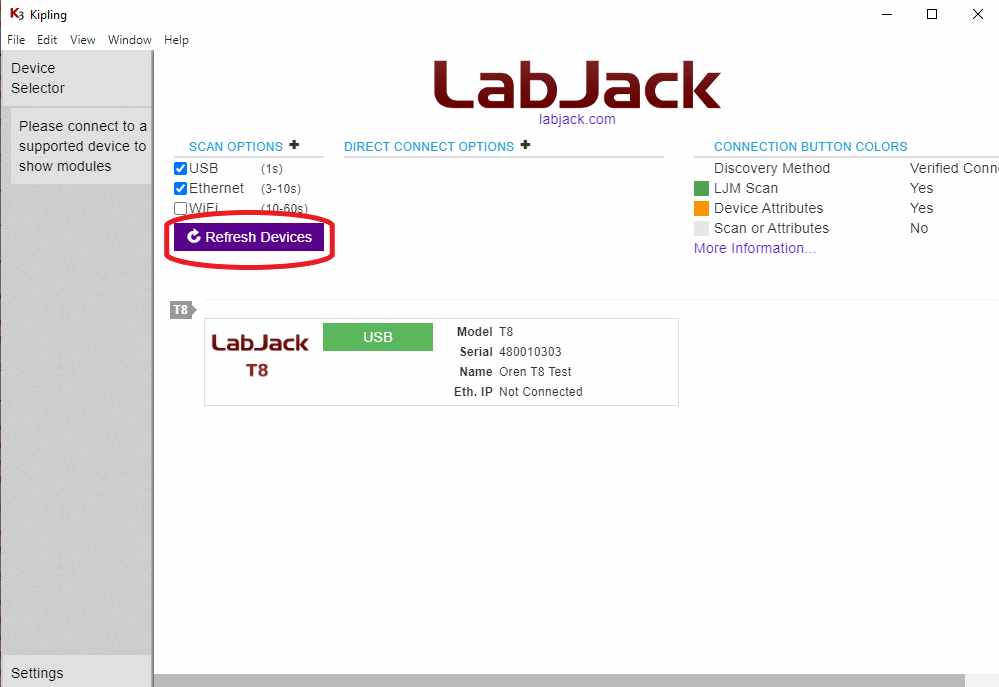
5. Click the connection (e.g. "USB").
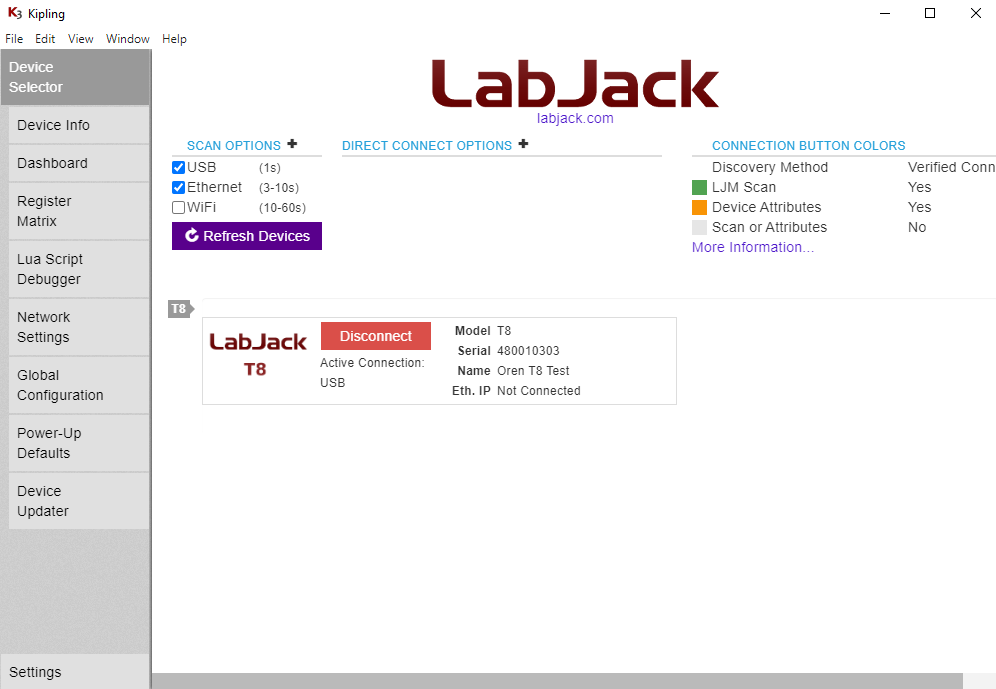
6. Navigate to the Dashboard.

7. Connect a jumper wire securely from DAC0 to AIN0+ and GND to AIN0-.
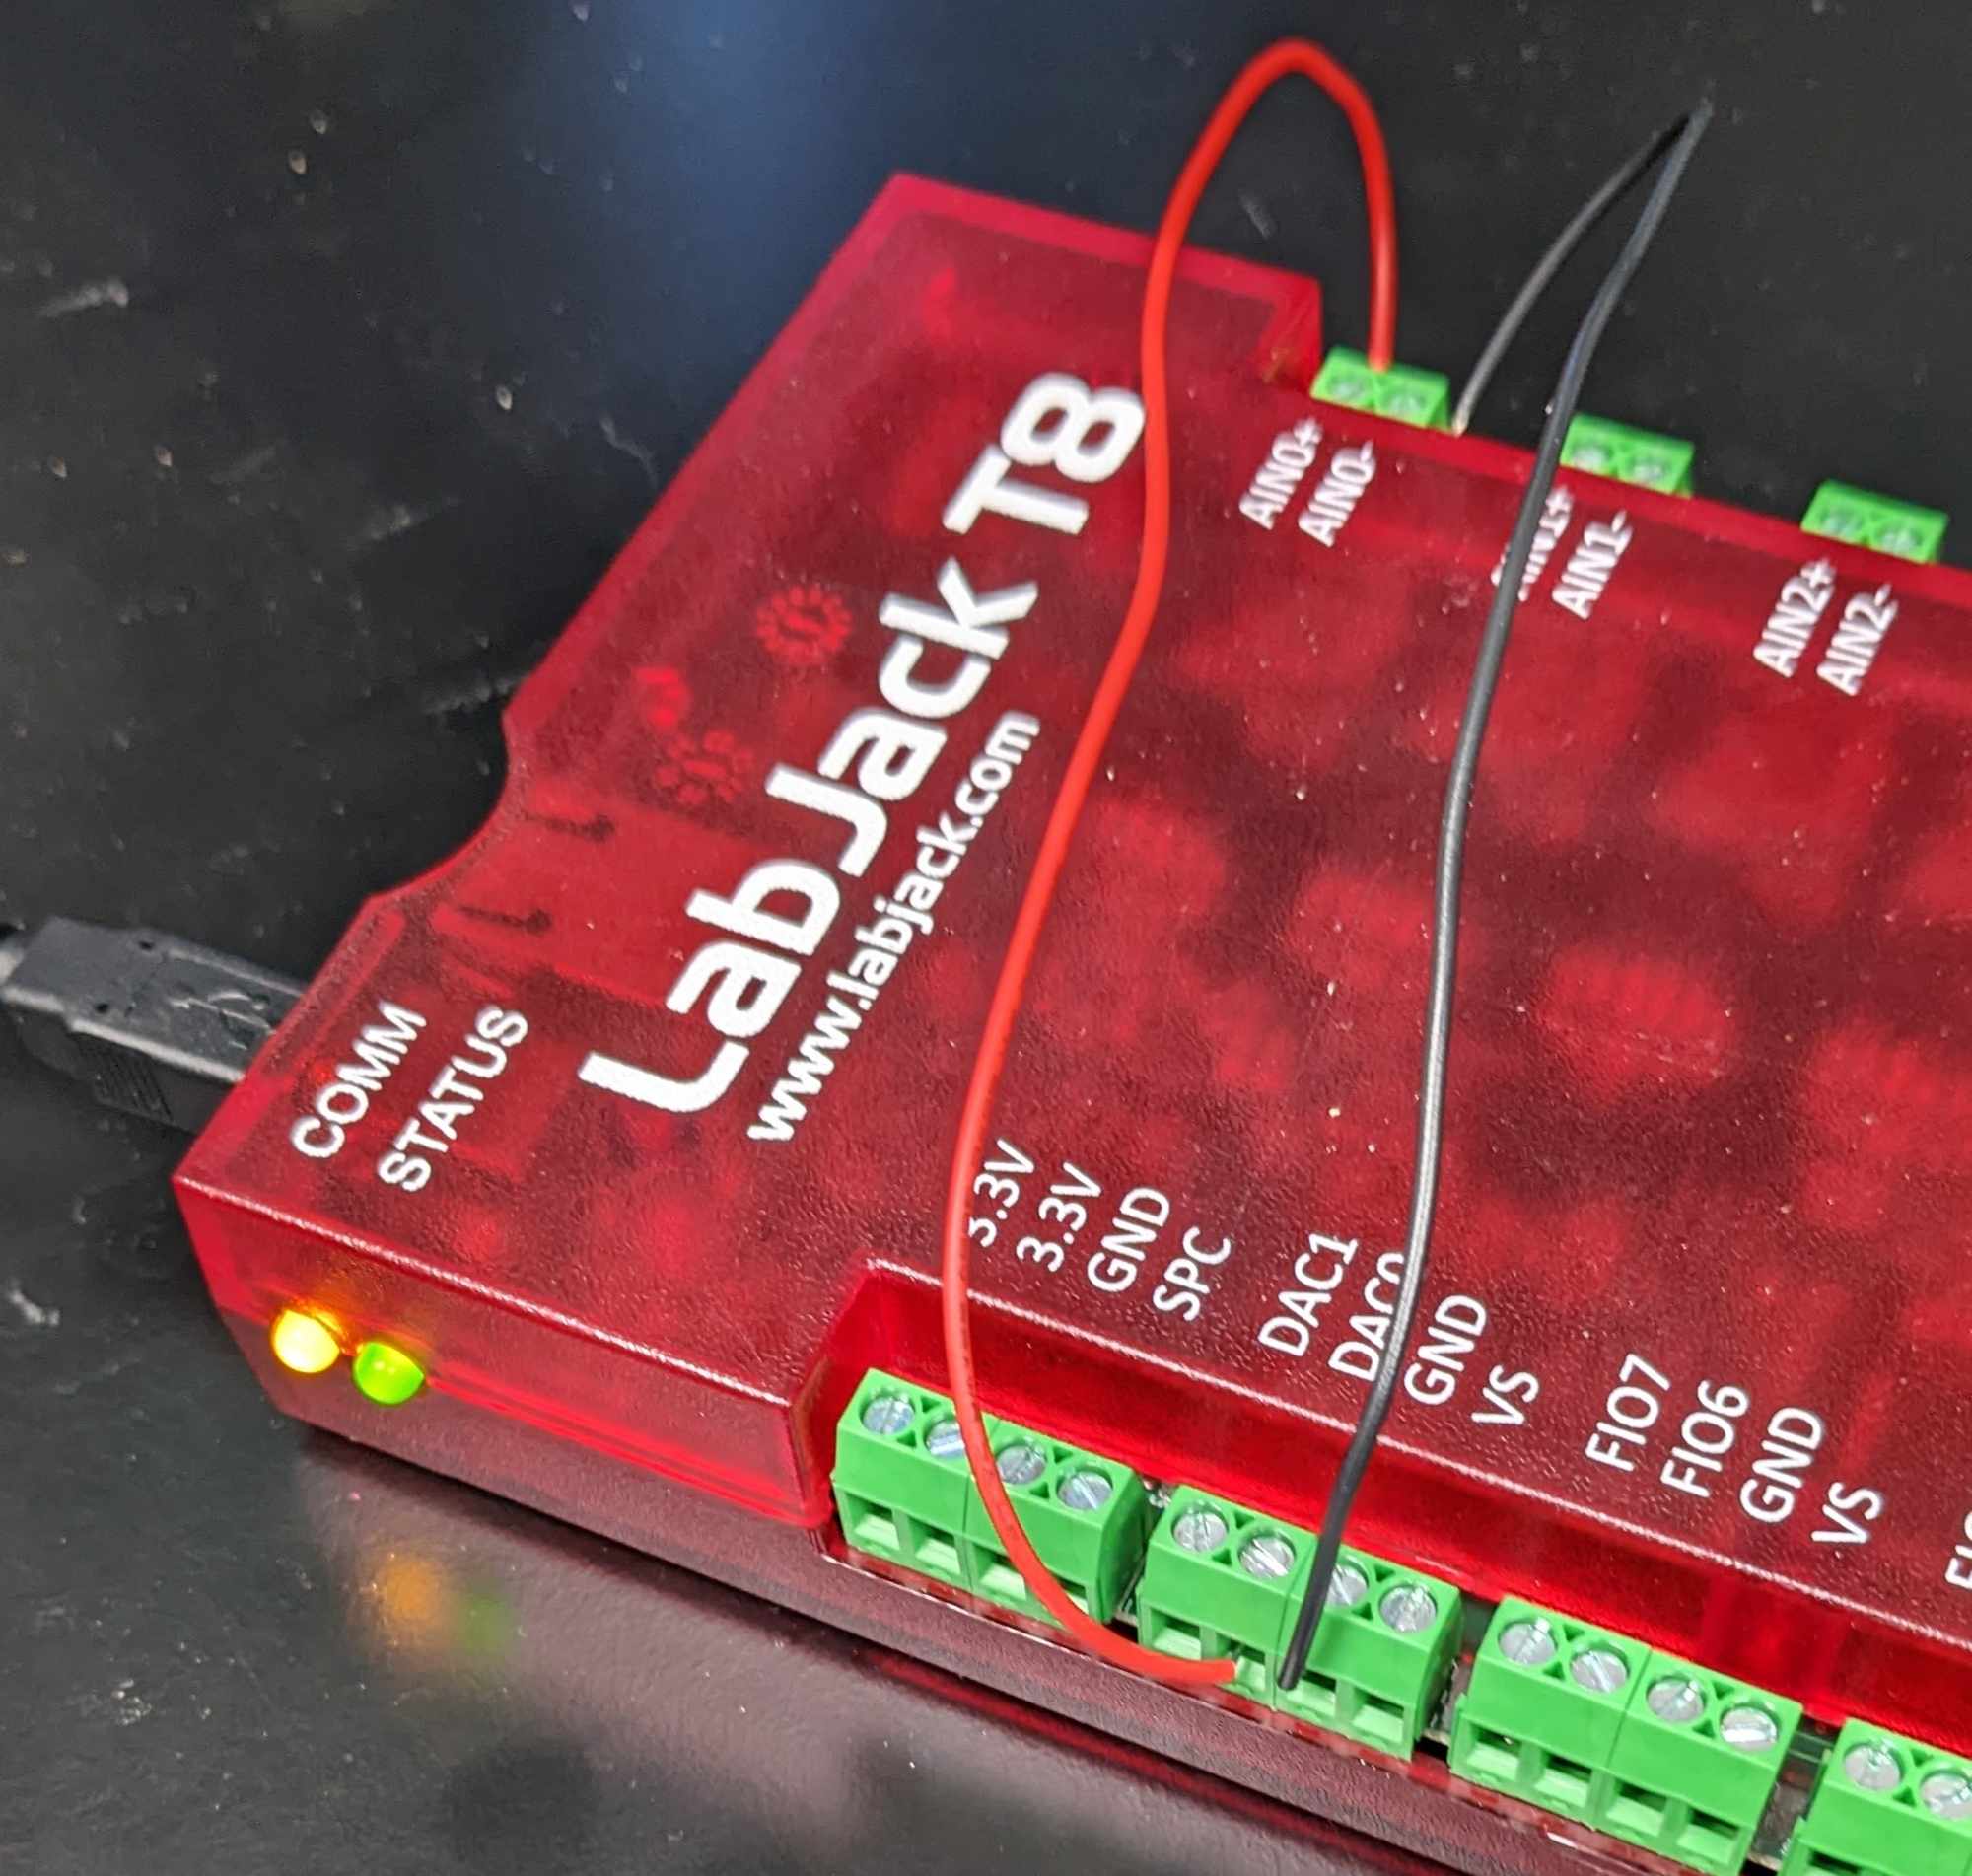
For a guaranteed valid connection, a conductor must be clamped securely in the screw-terminal, not just touching some part of the screw-terminal.
DAC stands for "Digital to Analog Converter", AIN stands for "Analog Input".
8. While still in the Dashboard, read the voltage level of AIN0.
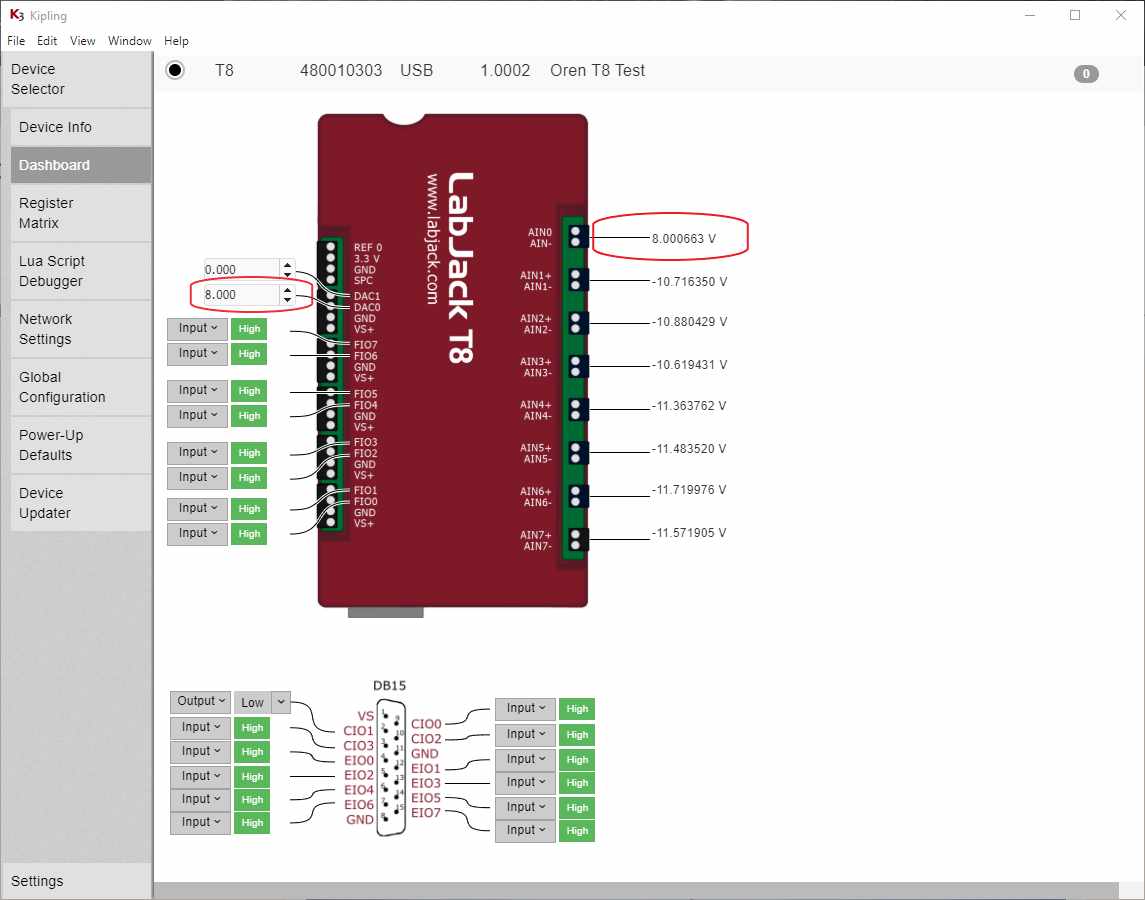
Adjust the DAC0 analog output voltage, and you will see AIN0 follow DAC0 if the jumper wire is installed.
9. Connect one end of the jumper wire to GND, touching the other end inside the FIO7 terminal.
GND stands for Ground. Try connecting and disconnecting the FIO7 end of the jumper wire.
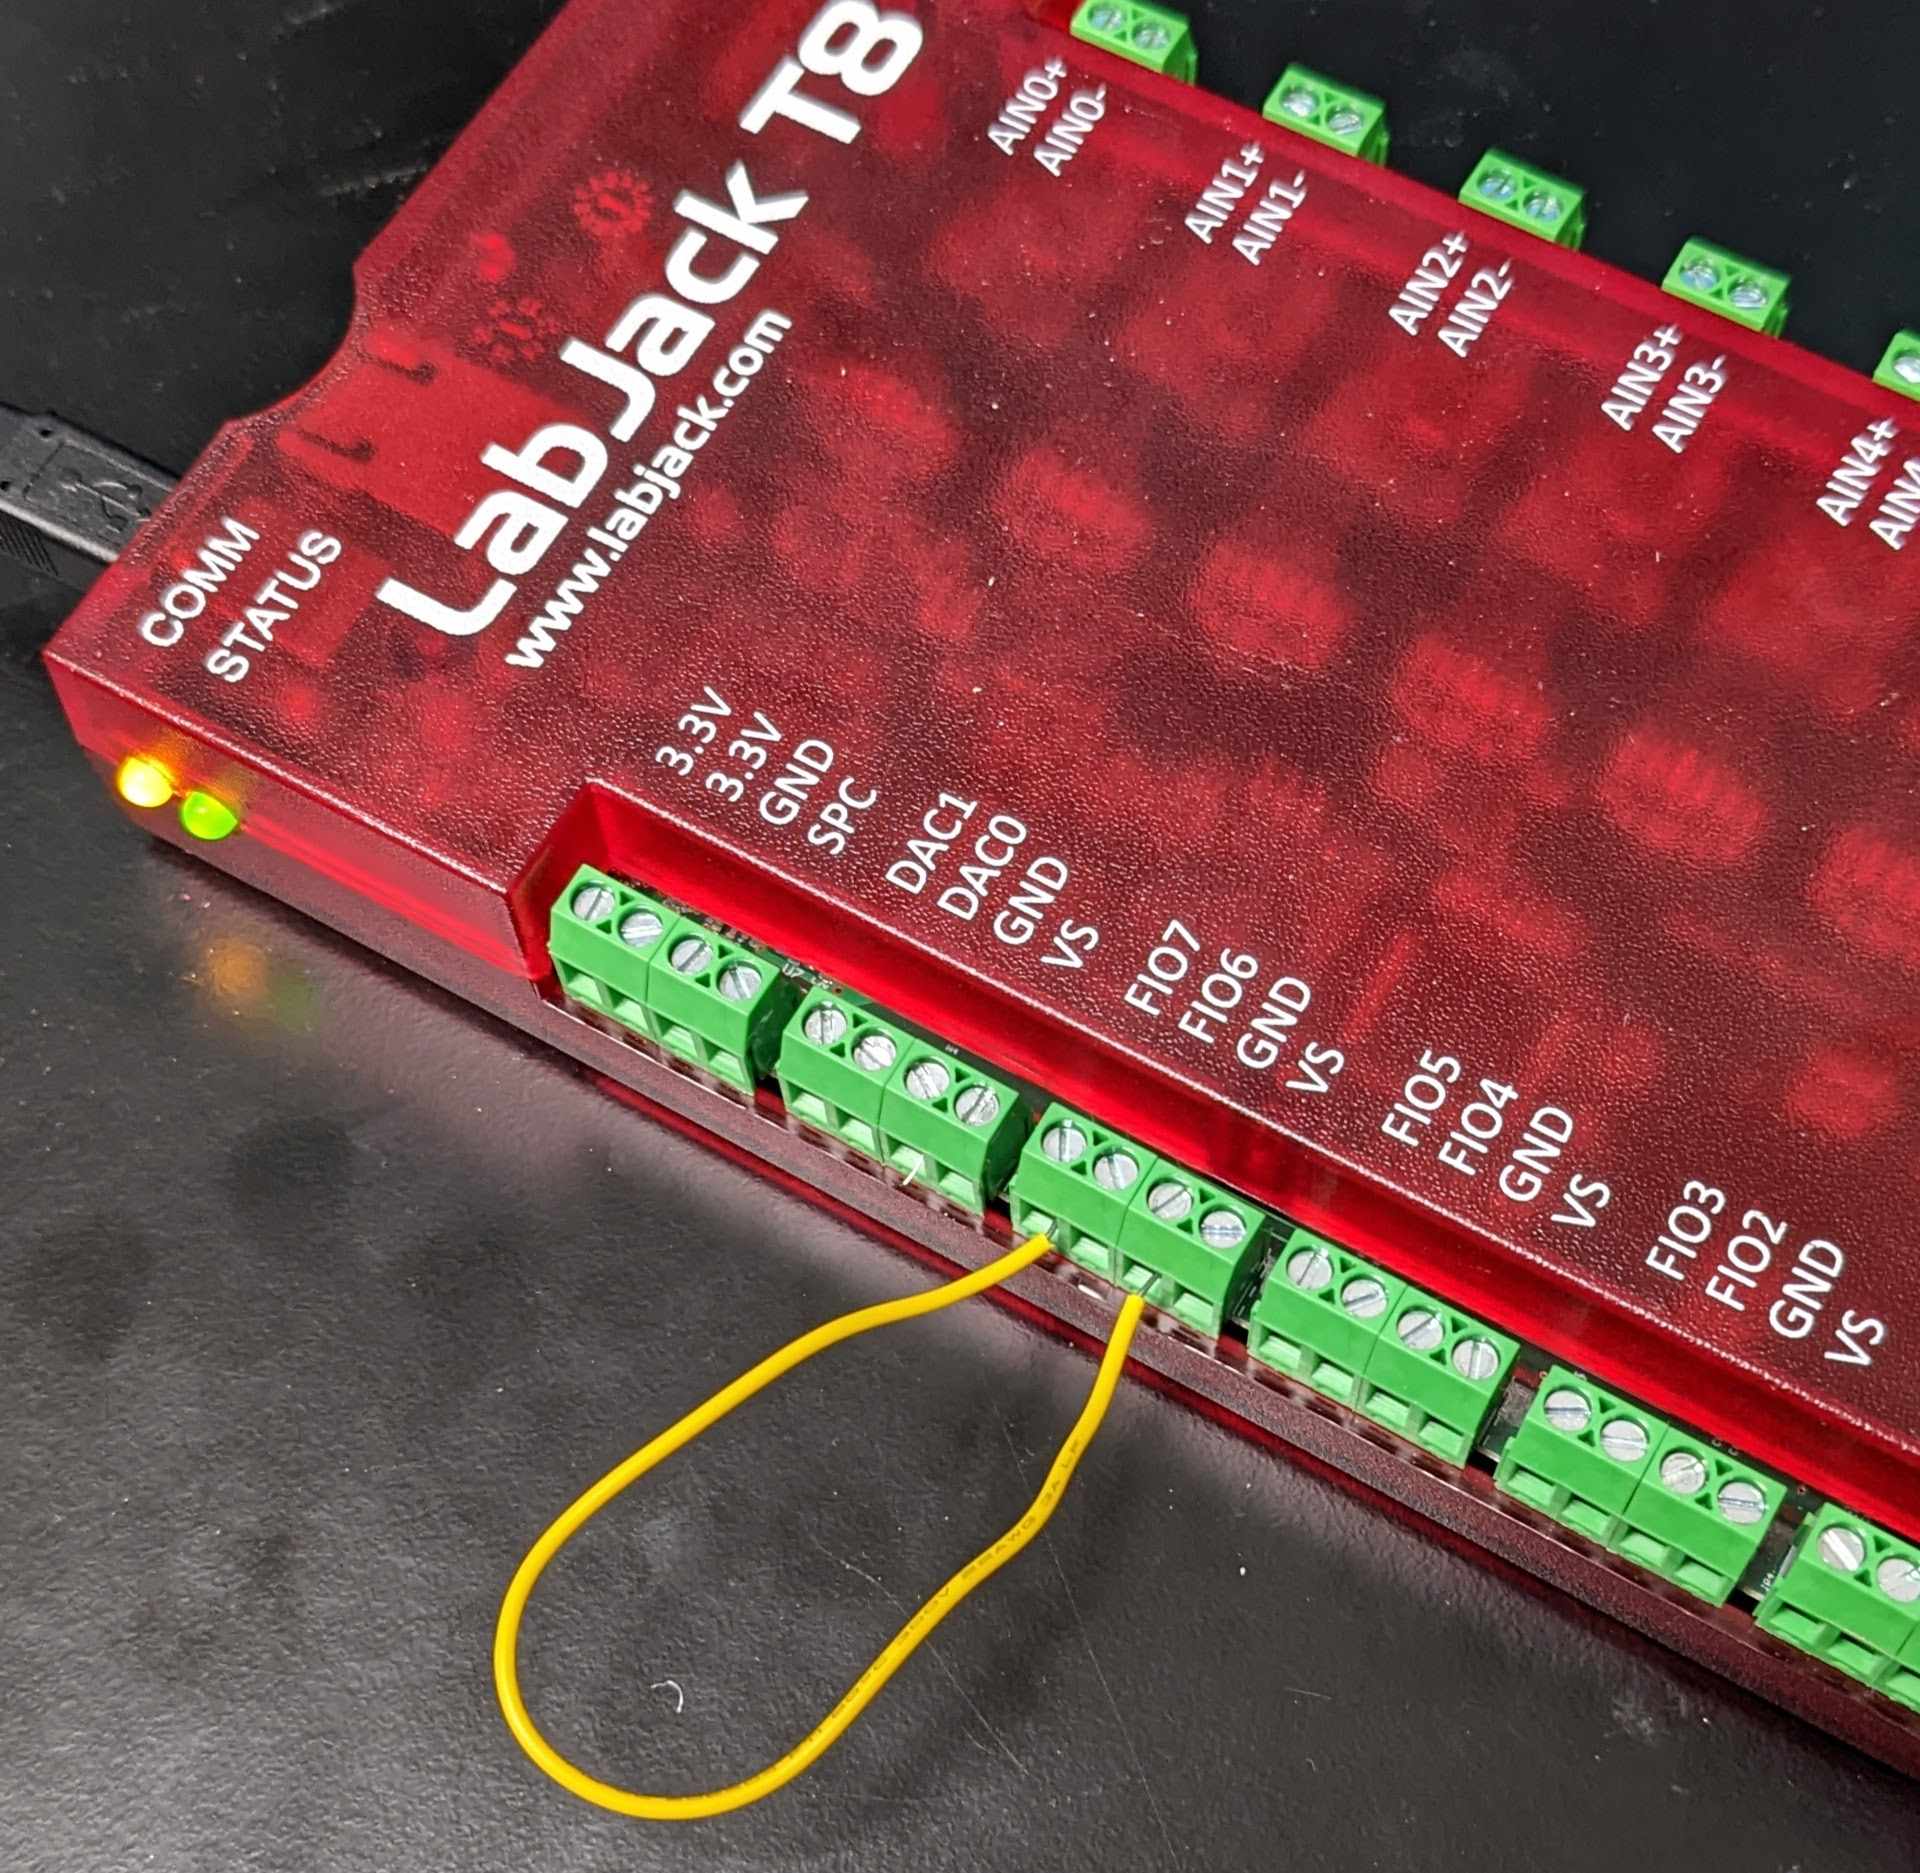
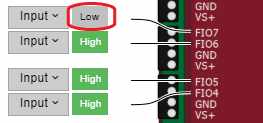
The Dashboard will read the current state of the digital input. Digital inputs have an internal weak pull-up resistor that holds them high when nothing is connected. When the GND wire is connected to FIO, the digital input will change from logic level High to logic level Low.
10. Next steps
The T-Series Support Home page contains information about connection options, ways to control and features of LabJack T-Series devices.