Multiple Power Supplies
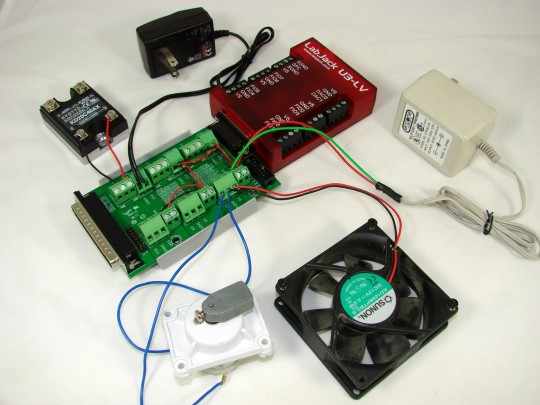
Lets say you want to control a 9V fan, a 9V motor, and a 5V relay. The configuration closely resembles Figure 3 of Appendix A - Wiring Diagrams.
Connect the 9V power supply to an inward facing VS/GND pair. Next connect the 5V power supply in a similar fashion. The image shows a 9V PSU connected to VS4/GND4, and the 5V supply on VS3/GND3. Finally, wire the fan and motor to a switching pair, with the positive side on S6, S7, and the negative side on GND4. The remaining relay is connected to the same area as the 5V PSU, positive side to S4 and negative to GND3.

Note: In the image the 9V supply is also spread to remaining switching pairs, similar to Figure 4 of Appendix A, but they are unused.
Turning the equipment ON/OFF is done by referencing the chart printed on the center of the PS12DC. Since the LabJack is connected to P1, that is the column of interest. Scan down the side locating switches number S4, S6, and S7. Next to S4 you will see EIO4, S6 -> EIO6, and S7 -> EIO7. It is not readily visible in the photo, but Appendix C - Pinout Info also contains the chart. Turning each external device on is as simple as toggling the state of those digital lines(EIO4, 6, 7) to output high.
Video Example
The video below shows the two PS12DC boards controlling several 18V solenoid valves. A C++ script issues commands to the U3-LV, which in turn controls the solenoid valves to open and close rapidly. The setup is a prototype for an automated bartender; Each valve will be connected to a different alcohol, and will mix together to create a unique drink.
