This is a simple application note that outlines how to build an electrocardiogram(ECG or EKG) with a LabJack T7-Pro. These instructions build off of Dr. Shawn's ECG build, which uses a T7-Pro and an LJ Tick-In-Amp. Since the T7-Pro has a built in amplifier, we wanted to provide an alternative method to Dr. Shawn's ECG that doesn't use the LJ Tick-In-Amp. In order to do this, you will need to measure the differential voltage between the two electrode pads using a pair of analog input terminals on your T7-pro. If you are unfamiliar with differential voltage readings, check out our Differential Readings (App Note).
Goals
-
Measure and graph the voltage produced by your own heart
-
Configure a differential voltage reading on your LabJack device
-
Use LJstreamM
-
Impress your friends with this cool, yet simple experiment
Hardware
-
LabJack T7-Pro or LabJack T7
-
A shielded cable with at least two wires and a ground (x1)
-
Electrode pads (x2)
-
Alligator Clips (x2)
Software
Physical Set Up
-
Place two skin electrodes on your chest as shown in Dr. Shawn’s tutorial.
-
Connect the two insulated wires to a pair of analog inputs (AIN0 and AIN1, AIN2 and AIN3, etc.) It is very important that you use a pair of consecutive analog ports for the differential voltage measurement. For these instructions, we will be referring to AIN0 and AIN1, however any pair of consecutive(AINeven, AINodd) terminals will work the same.
-
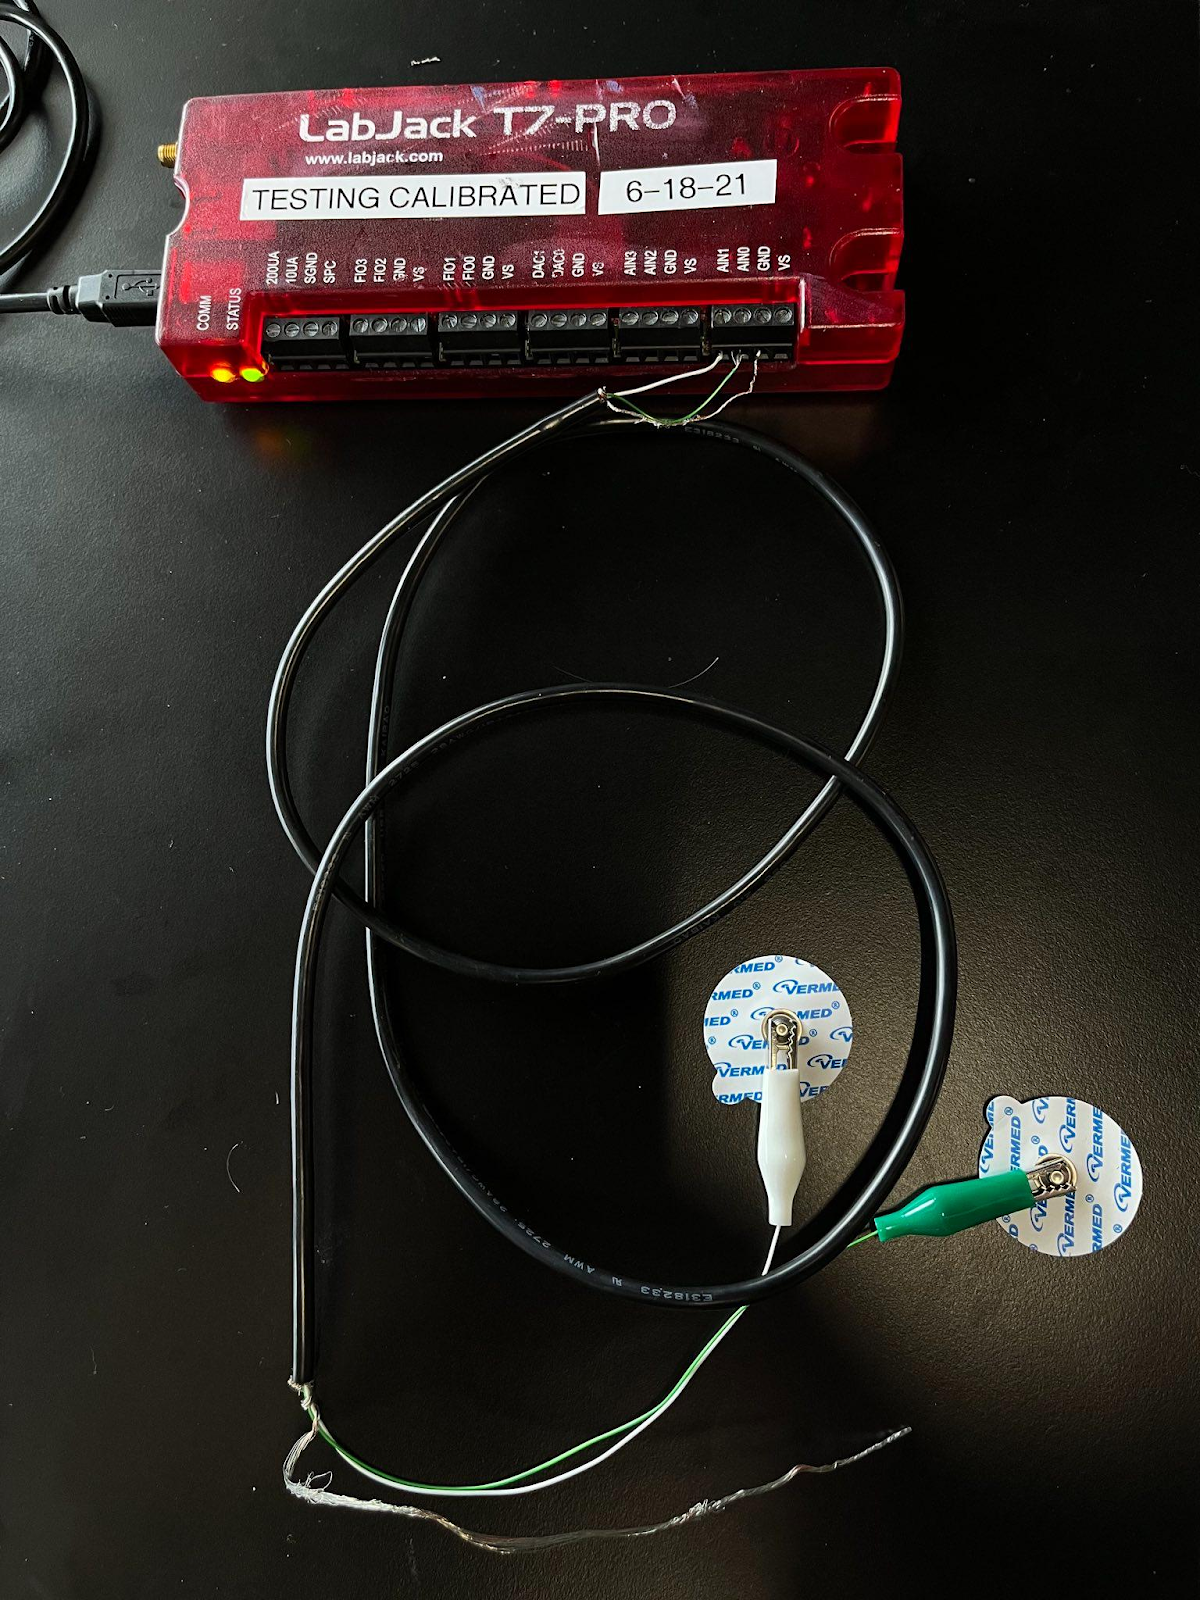
Connect your ground wire to any GND terminal on the T7/ T7-Pro.
-
Connect the two wires to your skin electrode pads using alligator clips and hold the ground wire in your hand.
The physical setup for your ECG is now complete. An image of LabJack’s physical configuration is provided below for reference:
If any of these instructions are unclear, make sure to check out Dr. Shawn’s video. He offers clear and detailed instructions on the general concepts and setup of this build. There are only a few differences between Dr. Shawn and LabJack’s ECG build. Understanding how Dr. Shawn set up his ECG is a good place to start if you are new to circuitry or data acquisition.
Configure Settings
Use the image below for reference to ensure you are using the correct settings. Written instructions are also included below.
-
Open up Kipling on your computer and connect your T7 - Pro
-
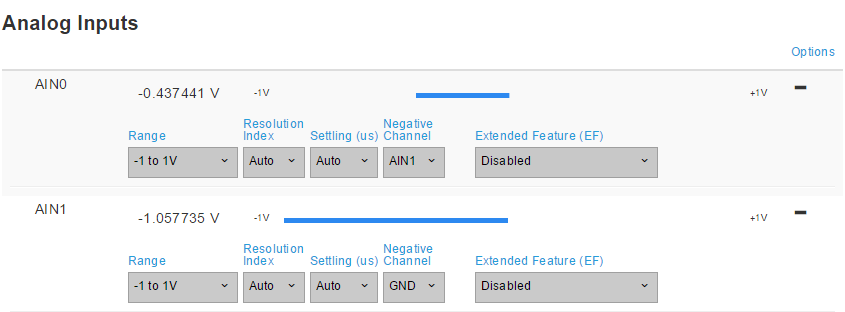
Navigate to the Analog inputs page inside Kipling
-
Expand the AIN0 window and set the negative channel to AIN1. This will measure the difference in electrical potential between AIN0 and AIN1 instead of AIN0 to GND.
-
For the most accurate readings, change the range of AIN0 and AIN1 to ±1 V. This will optimize the signal by ignoring some of the static noise your wires will pick up.
-
Once you have changed your analog input settings, you need to make sure to save these settings. Navigate to the Power-up Defaults window and click Configure Power-up Defaults. Your settings are now saved to your T7 - Pro!
-
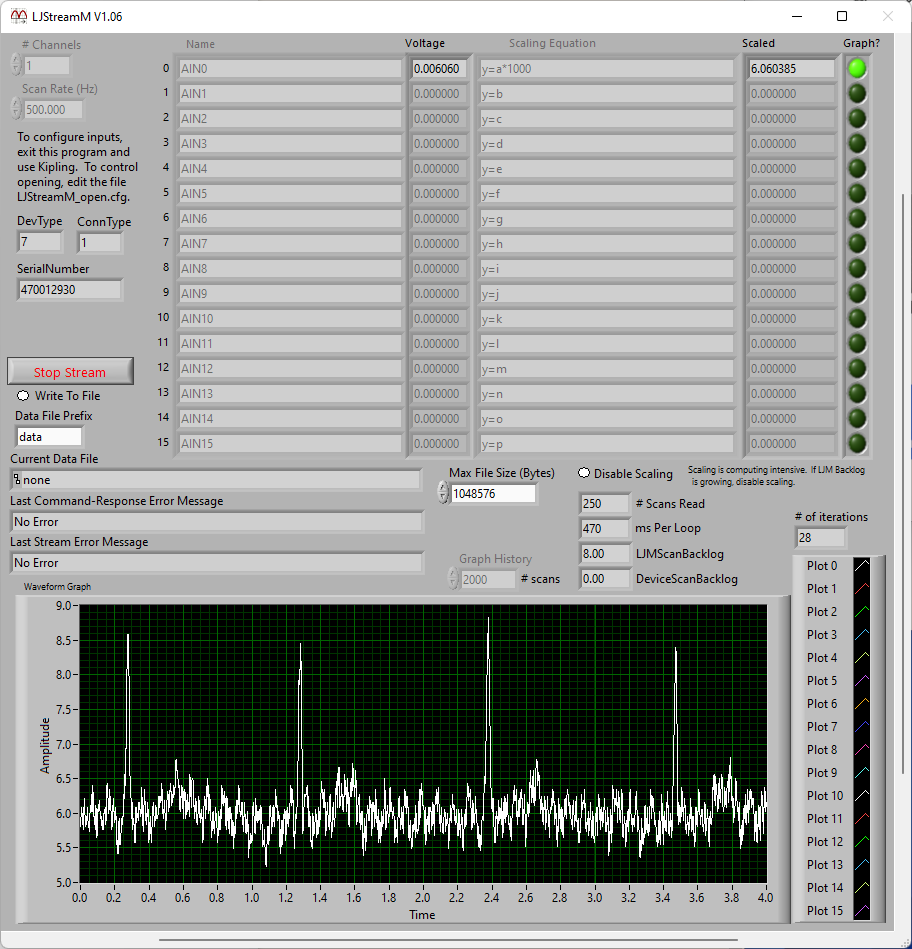
Close Kipling and open up LJstreamM.(Note: Kipling must be closed before LJstreamM can connect to your T7-pro) While you can read data in LJlogM, for the most accurate system, it is recommended that LJstreamM is used. A real ECG machine will take samples somewhere between 200 - 500 hz. These sampling speeds are only offered in LJstreamM, which is why it is recommended for this experiment.
-
Once LJstreamM is opened, set the sampling rate to 500 hz (for best results) and enter your desired scaling equation. We found that scaling your AIN0 by 1000 (V to mV) makes your signal much easier to read. LJstreamM automatically scales it’s graph so this is not absolutely necessary however manually scaling your readings makes it easier to view.
-
Choose the analog terminal you would like to graph and press start stream. After a few seconds you should see the electrical pulse of your heart. An example image is shown below.
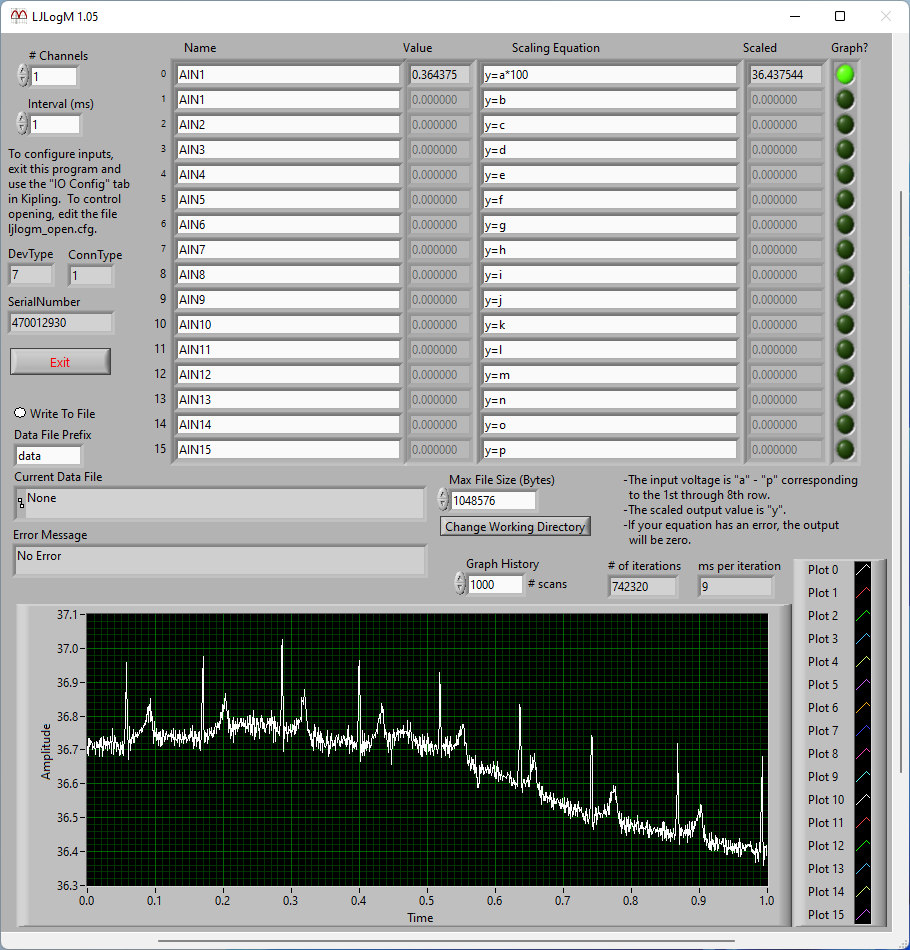
LJLogM
You may notice that there is a small amount of static noise in our readings. This is because we are not using, or trying to create, medical grade equipment. This build is meant entirely for scientific curiosity and should not be used in any medical context. If you are interested in reducing this remaining noise in your own build, check out our troubleshooting tips below.
Troubleshooting
If you find yourself still encountering considerable noise in your readings, don't give up just yet! There are a few easy things you can do to clean up your signal.
1. Improve your hardware
To fully optimize noise reduction, you must make sure that all of the wiring between yourself and your LabJack device is fully shielded. Any lengths of cable that are not shielded have the potential to pick up radio noise and affect your readings.
2. Reduce the impedance of your skin!
When Dr. Shawn dips his hand in sodium chloride solution (salt water), he is reducing the impedance of his skin. The sodium chloride solution improves conductivity, thus making it easier to read the small voltages that your body produces. Another substitute/complement to salt water is hand sanitizer or any alcohol based products. Alcohol will dry out the skin and improve the connection between skin and the electrode pad. While there are plenty of other substitutes and ways to achieve this, LabJack found success using sodium chloride and hand sanitizer in our ECG build. We would love to hear what works best for you! Contact Us.
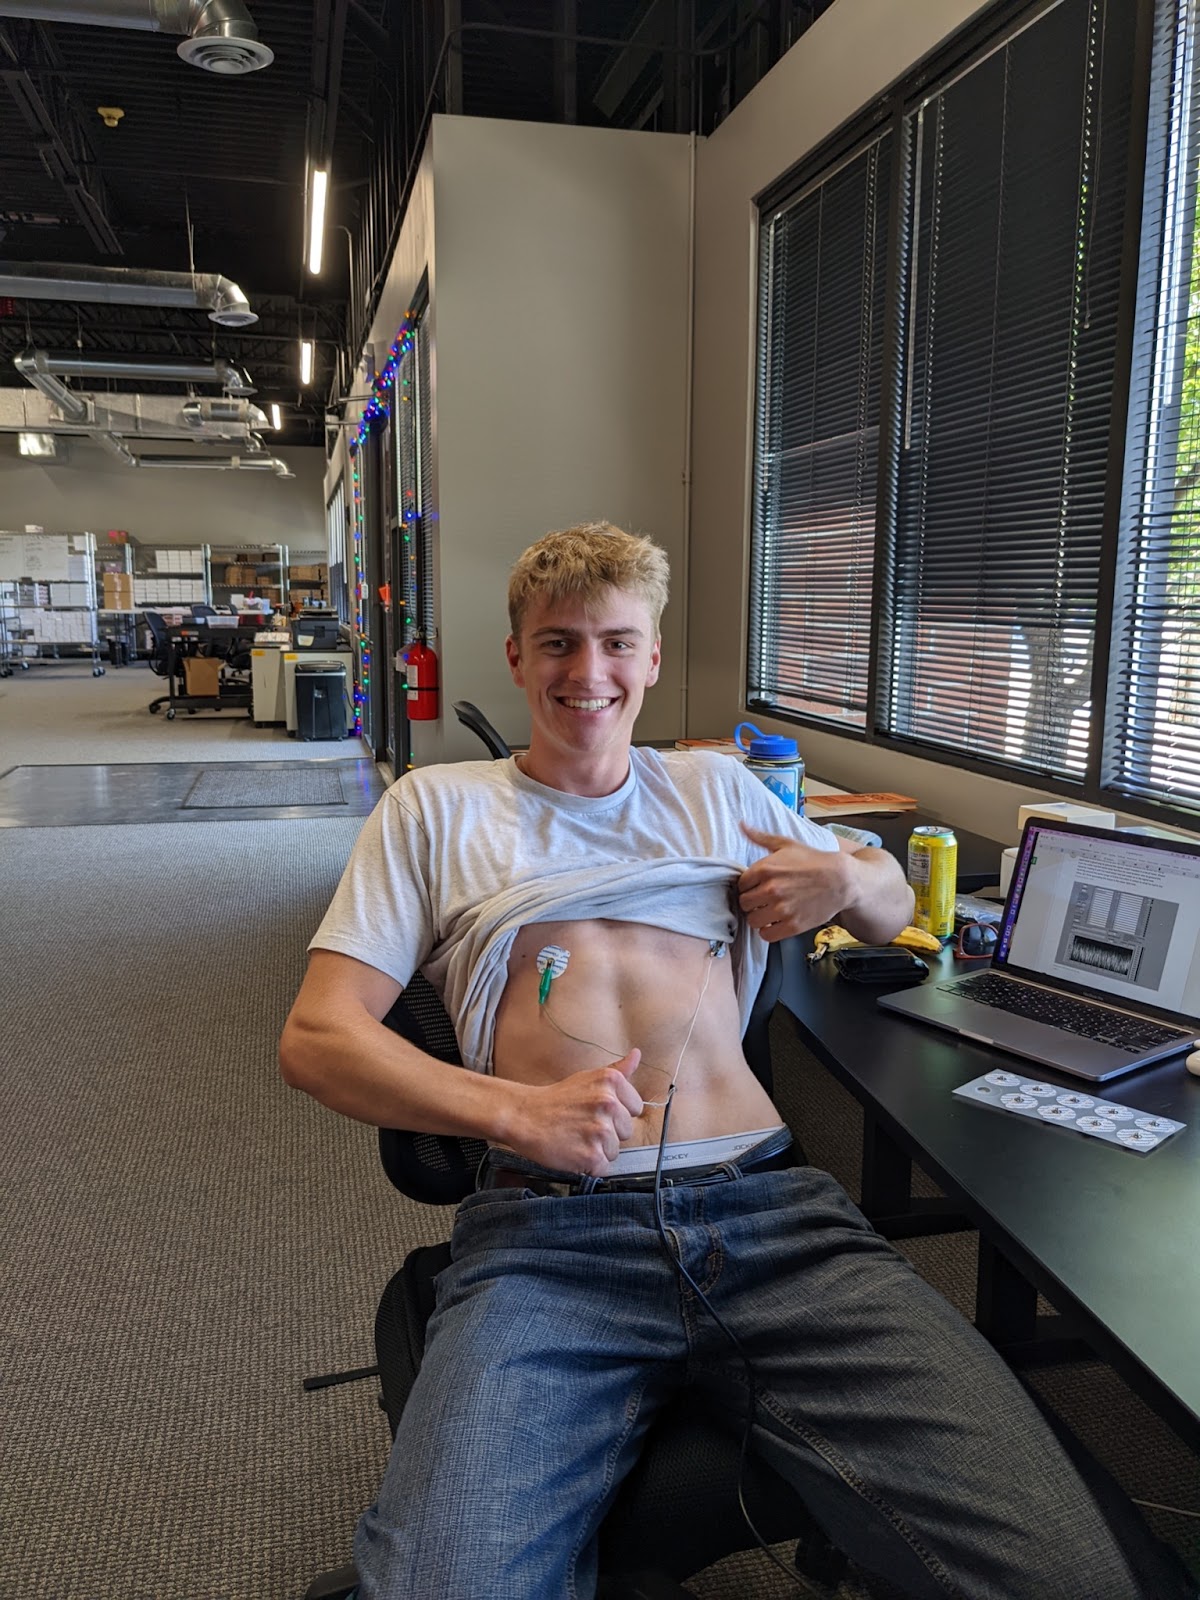
Your ECG is now complete! Here's our amazing intern Matt hooking himself up to his self made ECG.