Otero - Windows Only (Discontinued)
Production Status: NLA (no longer available). The Digit was discontinued in 2017.
Supported Devices
LabJack Digit (discontinued)
Overview
The software for the Digit logging device is called Otero. It is a simple program designed to make using a LabJack Digit straightforward and convenient. The essential parts of the program can be understood on the quickstart page, so this document serves as a more detailed review of program functionality.
Download/install the LabJack Windows software and driver bundle.
Open the program called Otero from the start menu. Or open the program directly under C:\Program Files (x86)\LabJack\Applications\Otero.exe
Subsections
Configuration
The configuration tab of the program is where most of the important decisions are made. To begin a new logging session, click "Erase Data & Begin New Logging Session". The Digit will immediately begin logging at the defined logging interval.
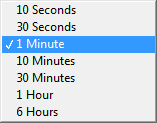
Logging Interval: The rate at which data is collected. If the environment is changing rapidly, you may choose to take a reading every 10 seconds. Or, if the environment is more stable, a log interval of 10 minutes may be all that is necessary to capture a good data set. Changes do not take effect until the user starts a new logging session.
Log Items: The kind of data to store in memory. If only temperature information is needed, disable the light reading. Or, to conserve battery life during storage disable all log items. Changes do not take effect until the user starts a new logging session.

LED Alarm Item: Which kind of data will trigger a user-defined alarm. Choose the item, such as light or temperature, then configure the alarm with a desired threshold. Alarms are not audible, when triggered, they will simply make the red LED light up on the next connection to a powered USB receptacle. View the current alarm status with the rectangular boxes green = no alarms triggered, red = alarms triggered, white = alarms disabled. The alarms cannot trigger unless they are first armed. Alarms are automatically reset when a new logging session starts. See the LED Alarm Configuration section for further details.

Battery Install Date: When the battery is replaced, change the install date to update the battery life estimator.
Device Name: To change the device name, select the text and enter a new name.

Recovery Flags: If there are system-level issues, such as battery power failure, the device will record a recovery flag. For instance, if the battery was temporarily removed during logging, the Power Failed recovery flag would be set, indicating that logging was interrupted. System Recovery flags typically mean that there was a disturbance, but the Digit was able to recover. Some additional information is available if you click on the "?" button.

Digit-TL/H Real-Time-Clock: Software will automatically synchronize the RTC with the host computer at the start of a new logging session. Also note that the Digit does not account for daylight savings or other timezone related differences, it simply stores a current time. This means that RTC synchronization before daylight savings rollover will show a 3600 second difference after the rollover.

Erase Data & Begin New Logging Session: Erases past data, synchronizes the RTC with the host computer, clears alarms, and begins a new logging session. The Digit can only store a single logging session, so once memory is full (262,144 readings), it is necessary to begin a new logging session. Users may begin a new logging session at any time, but doing so will erase any previously recorded data.

LED Alarm Configuration
The alarm configuration screen is for changing parameters related to LED indicators. When the Digit is connected to a powered USB port, it will immediately illuminate an LED indicating alarm status. If any alarms have been triggered, the red LED will illuminate, if no alarms have been triggered, the green LED will illuminate. Once configured, these alarms make it possible to quickly verify threshold conditions have not been exceeded, no need to download data or have a computer around!
It is easiest to think of the alarms like a security system, first it becomes armed by a defined condition, then once armed it can be triggered by a defined condition. Once triggered, the red LED will illuminate instead of the green one.
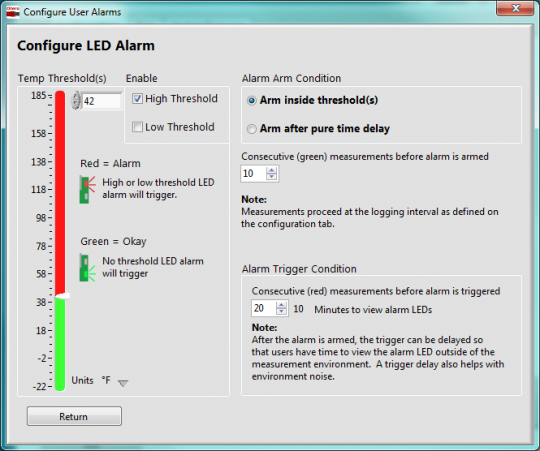
High Threshold: The upper threshold, or trip-point for a user-defined alarm to be triggered. For instance, set a high threshold of 37°F, and disable the low threshold for refrigerator monitoring. Once the Digit is configured, and stored inside the refrigerator, you can periodically check the LED alarm to verify that the contents of the refrigerator have not spoiled.
Low Threshold: The lower threshold, or trip-point for a user-defined alarm to be triggered. For instance, set the low threshold to 32°F, and the RED led will illuminate on next USB connect if the Digit experienced below-freezing temperatures.

Enable High Threshold: The high threshold will be used for alarm triggering.

Enable Low Threshold: The low threshold will be used for alarm triggering.

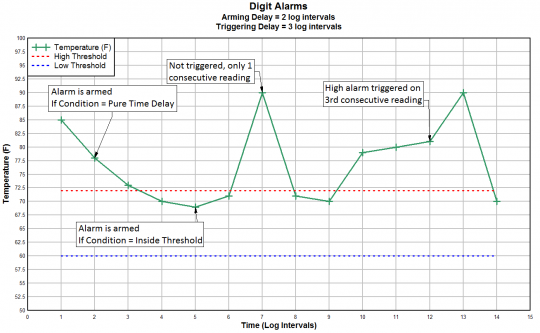
Alarm Arming: How the alarm is armed; that is, inside threshold region or after a set amount of time. See example below.
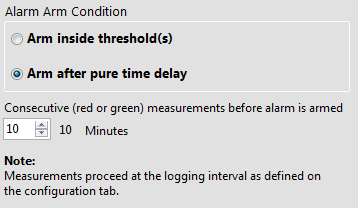
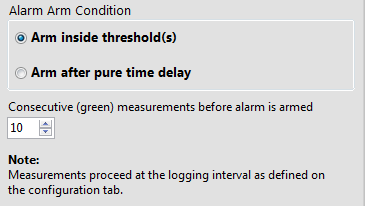
Alarm Arming Delay: Within threshold = How many in-bounds readings required to arm the alarm. Pure time delay = The number of log intervals to wait before arming the alarm.
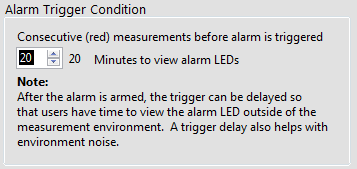
Alarm Triggering: How many consecutive readings (above/below) threshold required to trigger the alarm. The alarm will not trigger unless it is armed, and the defined number of consecutive alarm readings have occurred. See example.
Example: Arming delay is set to 2, and triggering delay is set to 3.
Data
The Data tab is where data is downloaded and reviewed. Temperature readings collected while USB was connected are indicated in orange.
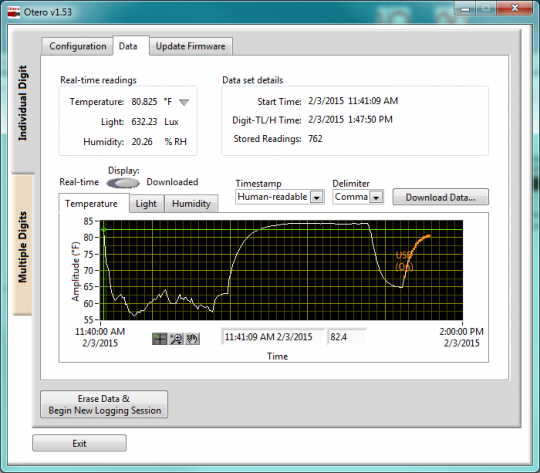
This tab contains real-time data, and download options.
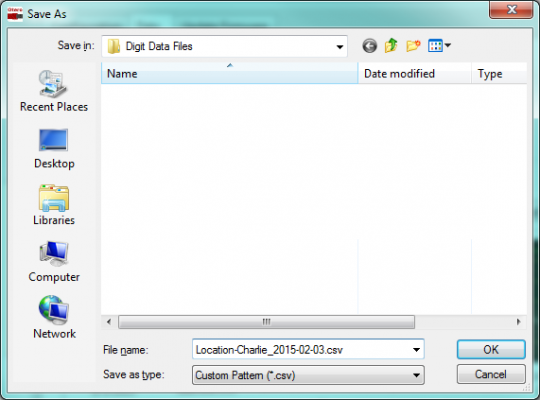
Download Data: Click "Download Data..." to download data.

A file dialog will appear. Create and save the data file by clicking "OK". Click "Cancel" to skip saving the file.
Temperature Units: Change the temperature units with the adjacent downward grey arrow. Changing the units here will also change the units of downloaded/exported data.
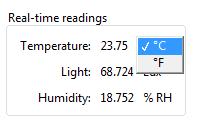
Start Time: The date/time when logging was started. Start time is the timestamp for data.
Digit-TL/H Time: The current time stored in the real-time clock of the Digit-TL/H.
Display: Toggle display between real-time readings, and downloaded data by switching this control.
Timestamp: The format of the timestamp in exported data files. Human-Readable is in the format [YYYY-mm-dd HH:MM:SS], Seconds ->1970 is the number of seconds that have elapsed since January 1, 1970, also known as the Unix timestamp. Both will export the data file with both timestamp formats included.
Delimiter: The delimiter in the exported .csv file. Choose Tab, Comma, or Semicolon. The delimiter is set to comma by default. If the system decimal separator is comma, the program will change the default delimiter to tab (introduced in v1.49 of Otero to aid international users).
Blank Readings: The format for blank data space in exported data files. The program will convert blank memory (0d65536) to a more friendly number, such as 0.00, "blank" as a string, or 0.000001. "blank" is the default setting because it is most intuitive when looking through data manually. It is recommended to select 0.000001 for programmatic parsing, since no valid data will ever be that number.
Zoom Tools: Zoom in, zoom out, or selectively highlight and view data by using the zoom tools. It is also possible to highlight the date text using the cursor, and manually type in a new date. After you enter a new number, click anywhere on the program screen for the new scale to take effect.

Cursor Indicator: Move the cursor around to see the time and value of each data point.
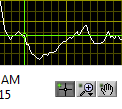

Hand Move: Move the whole screen around with the hand tool.

Update Firmware
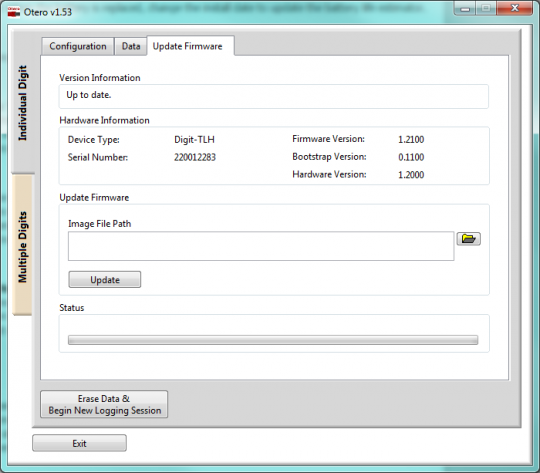
The update firmware tab contains all the necessary items to update your firmware. Download the latest firmware file from the firmware page, then use this portion of the program to update to the downloaded file. The update process takes only a few moments, but bear in mind that upgrading will erase your stored data. It is advised that you first download your data, then update the firmware.
Old Otero Users Manual (<v1.50)
