Summary
T-series devices can connect to a computer via USB or Ethernet, and the T7-Pro can be connected using USB, Ethernet, or WiFi. Most of the time people will deploy T-series devices by using the 5V USB adapter to provide power. In most cases it is necessary to first configure the device over a USB connection to the computer. For general questions about networking and troubleshooting, see the Basic Networking & Troubleshooting App Note.
The following instructions are for the typical scenario of connected to a network with a DHCP server (i.e. a router is present on the network). If you are trying to connect your LabJack directly to your computer, you most likely do not have access to a DHCP server. See our Direct Connection via Ethernet App Note.
Kipling Network Settings and Configuration
1. Connect the T-series device to the computer via the USB cable.
2. Open Kipling (Windows: Start → Programs → LabJack → Kipling), and connect to the device over USB.
If the program isn't installed, you will need to download and install one of the installers on our software page.
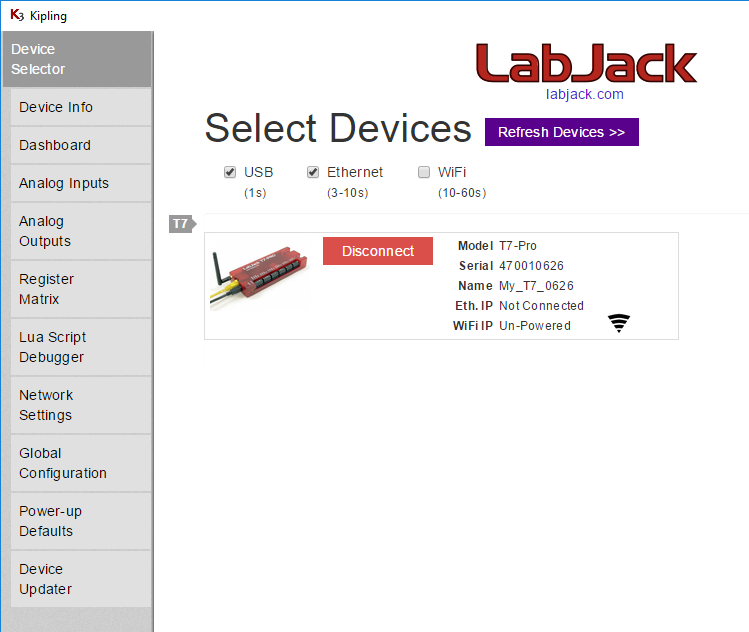
3. Go to the Network Settings tab.
Ethernet Setup
Go through the Kipling Network Settings and Configuration section above.
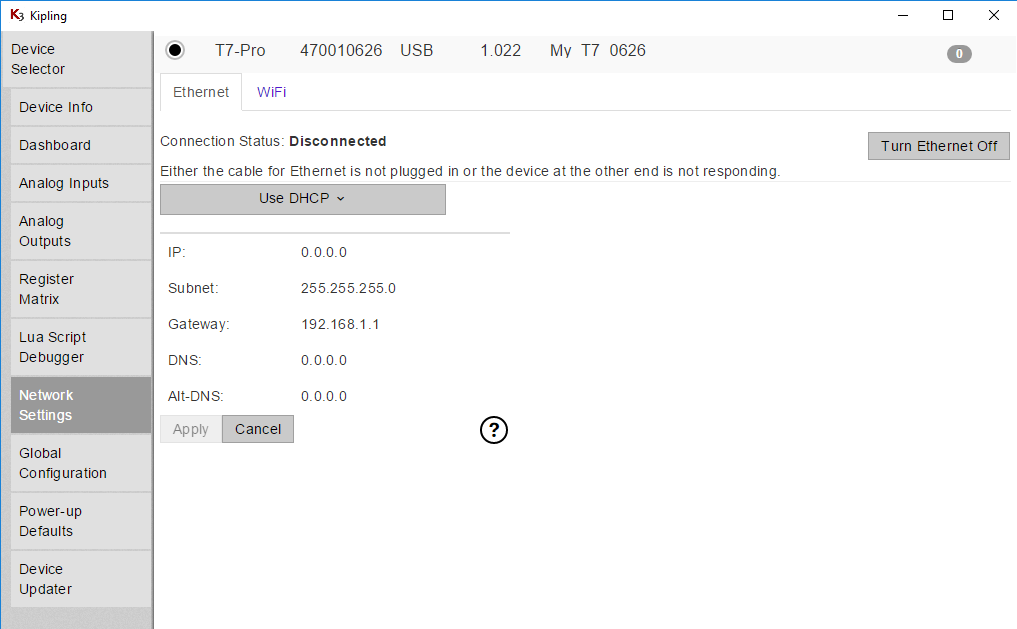
Connect the Ethernet cable, and observe the Connection Status.
Look for Connection Status: Connected. If the connection status is not connected, see the Ethernet troubleshooting tips at the end of the Basic Networking & Troubleshooting App Note.
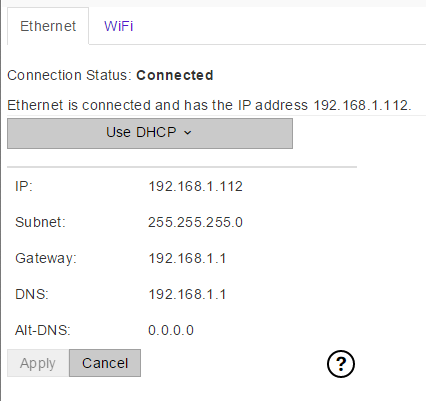
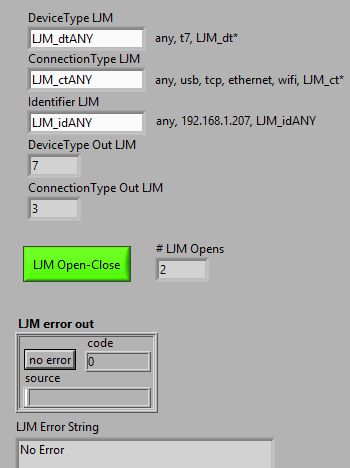
The Kipling panel, shown above, displays the Device's current status. If the Device's values have been set but it is not connected to an Ethernet network, all values will show as zero, indicating no active connection.
Ping the device to confirm it responds.
If Use DHCP is selected, the IP address and other settings will be automatically configured by your router (DHCP server).
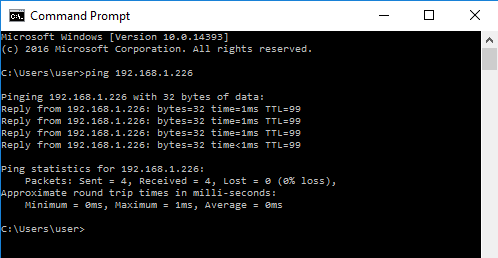
This is convenient, but often it is better to manually assign a static IP so you always know the IP of the device and can do a specific open with that IP (rather than a search-based open). In this example we will set the T7-Pro to use 192.168.1.226, so first we open a Command Prompt and do a Ping to make sure nothing responds at that IP address.
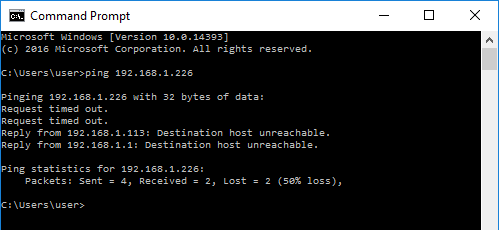
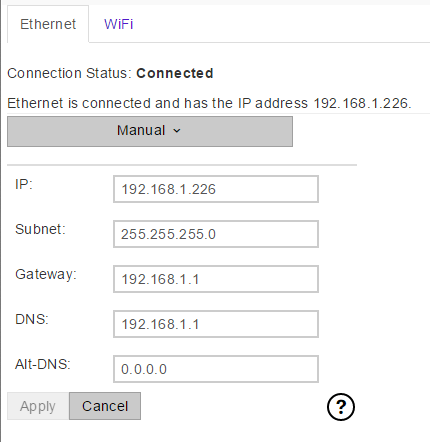
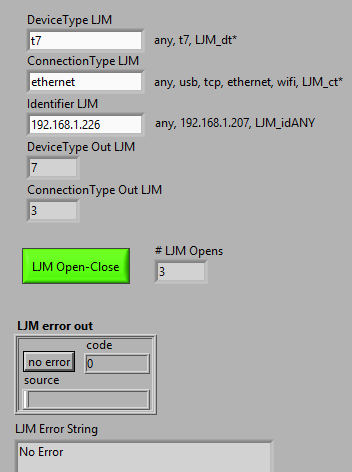
Change the Ethernet setup to Manual, enter the desired IP, and click Apply.
Subnet is typically set to 255.255.255.0, Gateway is typically set to the IP of your router, and DNS typically does not matter. Note: Make sure you are running firmware 1.0217+ as some earlier versions had an issue with Ethernet static IPs.
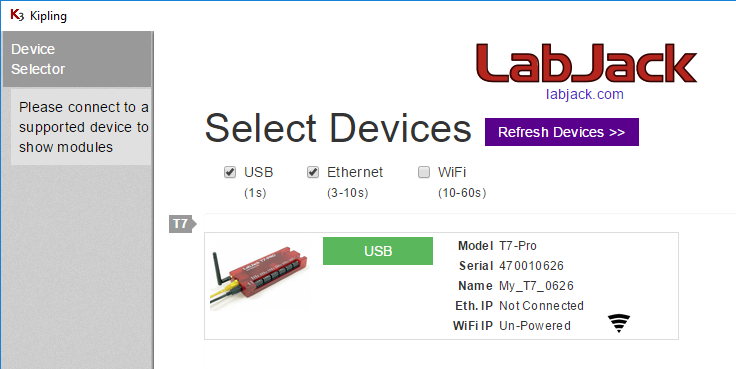
Go back to the Device Selector tab, click Disconnect to disconnect from USB, and click Refresh Devices.
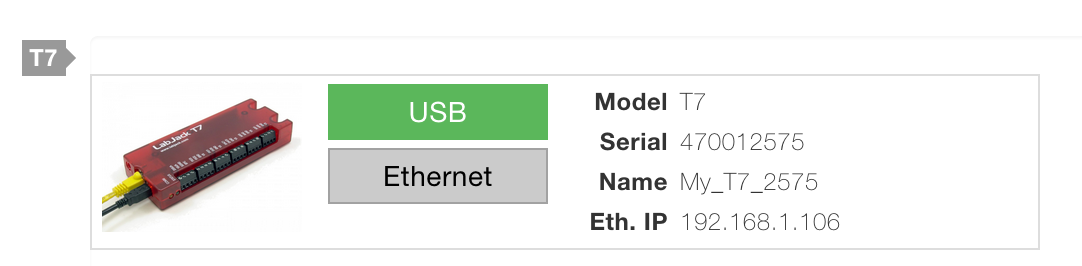
You should typically see that Kipling's device search now finds the Ethernet connection.
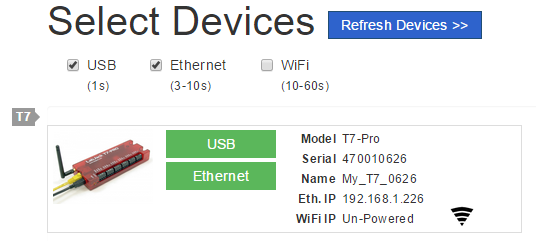
If the Ethernet connection does not show up as shown above, it could be that the connection is fine but the search used to find the connection does not work on your network. Continue with steps 8 & 9.
Ping the device to confirm it responds.
(Optional) If the device's Ethernet button is still grey and it can't be pinged, (steps 7 and 8), try configuring the computer being used with a static IP address.
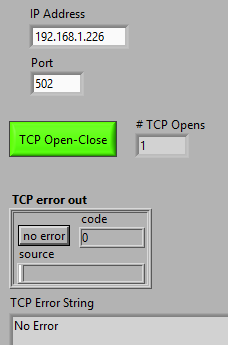
(Optional) Use the Windows utility TCPOpenTesting.exeto test 3 different types of opens.
Also, the TCP Open Testing in Python App Note describes how to do these tests on any supported operating system. Refer to the Opening & Closing documentation in the LJM User's Guide.
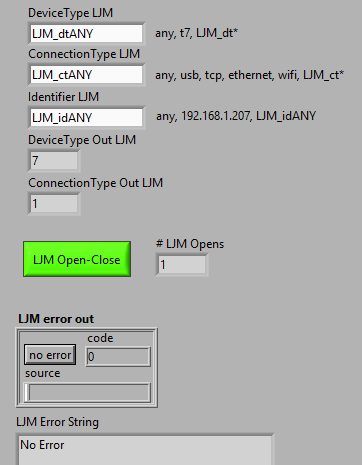
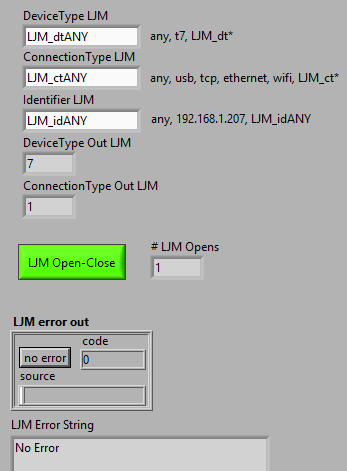
The above seems to show success, but note that ConnectionType Out is 1 which is USB, so we disconnect USB and just connect to a power supply and do another search open getting a ConnectionType Out of 3 which is Ethernet. These constants can be found in the header file LabJackM.h and in the Constants section of the LJM User's Guide.
If the LJM search open is not finding the Ethernet connection (steps 7 & 9B above), there is an optional step to configure LJM (on a particular computer) to include certain specific IP addresses during a search open.
In this case we would simply add 192.168.1.226 to ljm_specific_ips.config using any text editor. See LJM Specific IPs in the LJM User's Guide.
LJLogM & LJStreamM: By default these programs do a search open (any-any-any). To do a specific open edit the _open.cfg file as described in the "DevType, ConnType ..." section of the LJLogM or LJStreamM page.
For further information see the Basic Networking & Troubleshooting App Note.
WiFi Setup
Go through the Kipling Network Settings and Configuration section above.
If the Connection Status is "Un-Powered", click the button "Turn WiFi On".
Enter the Network Name (SSID) and Password, then click Apply. The network name and password are case sensitive. The Connection Status will cycle through different values but then should settle on Associated and stay there. This is called joining. If problems are encountered see the troubleshooting tips at the bottom of this page.
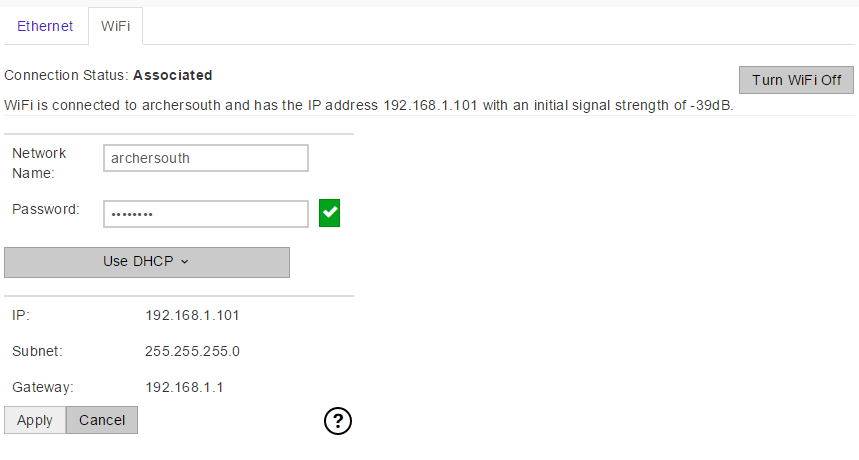
Note the "Connection Status: Associated" above. If your device is not associated (not joined to the WiFi network), see the WiFi Troubleshooting Tips section towards the bottom of this page. If your device is associated, continue with the next step (or skip to step #14 if you do not want to use a static IP).
Ping the device to confirm it responds.
If Use DHCP is selected, the IP address and other settings will be automatically configured by your router (DHCP server).
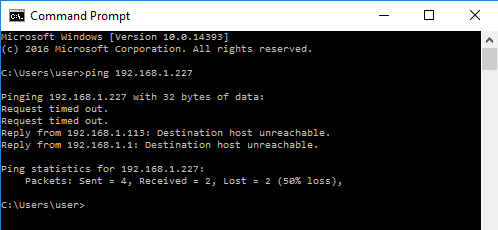
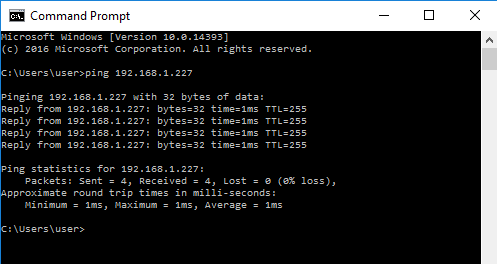
This is convenient, but often it is better to manually assign a static IP so you always know the IP of the device and can do a specific open with that IP (rather than a search-based open). In this example we will set the T7-Pro to use 192.168.1.227, so first we open a Command Prompt and do a Ping to make sure nothing responds at that IP address.
Change to Manual setup, enter the desired IP, and click Apply.
Subnet is typically set to 255.255.255.0 and Gateway is typically set the IP of your router.
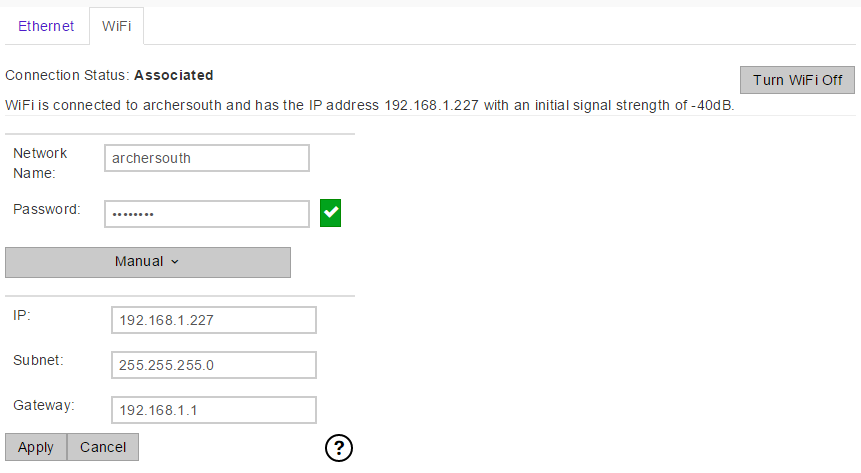
Note that all settings, including Password, are always written. If the Password box looks as follows and you click Apply you will write a blank password (0 characters) to the device.

Note the "Connection Status: Associated" above. If your device is not associated (not joined to the WiFi network), see the WiFi Troubleshooting Tips section towards the bottom of this page. If your device is associated, continue with the next step.
Go back to the Device Selector tab, click Disconnect to disconnect from USB, and click Refresh Devices (make sure the WiFi box is checked to include WiFi in the search)
You should typically see that Kipling's search now finds the WiFi connection.
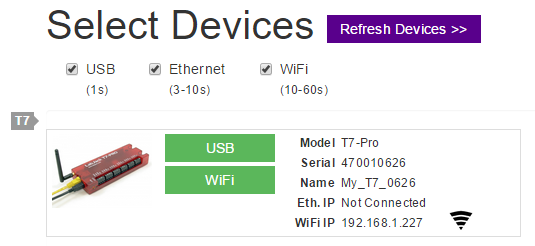
If the WiFi connection does not show up as shown above, it could be that the connection is fine but the search used to find the connection does not work on your network. Continue with steps 16 & 17.
Do a Ping to confirm the device responds.
Use the Windows utility TCPOpenTesting to test 3 different types of opens.
Also, the TCP Open Testing in Python App Note describes how to do these tests on any supported operating system. Refer to the Opening & Closing documentation in the LJM User's Guide.
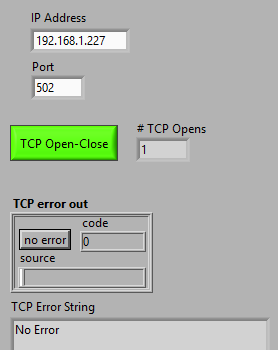
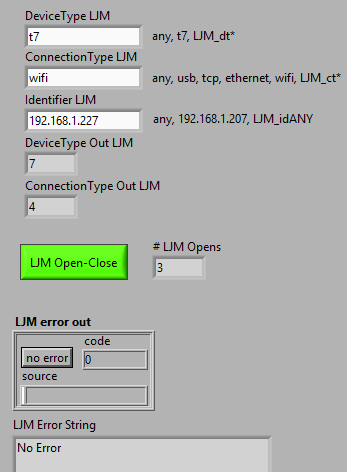
The above seems to show success, but note that ConnectionType Out is 1 which is USB, so we disconnect USB and just connect to a power supply and do another search open getting a ConnectionType Out of 4 which is WiFi. These constants can be found in the header file LabJackM.h and in the Constants section of the LJM User's Guide.

If the LJM search open is not finding the WiFi connection (step 15 above) there is an optional step to configure LJM on a particular computer to include certain specific IP addresses during a search open.
In this case we would simply add 192.168.1.227 to ljm_specific_ips.config using any text editor. See LJM Specific IPs in the LJM User's Guide.
LJLogM & LJStreamM: By default these programs do a search open (any-any-any). To do a specific open edit the _open.cfg file as described in the "DevType, ConnType ..." section of the LJLogM or LJStreamM page.
WiFi Troubleshooting Tips
See the WiFi troubleshooting App Note.
Connections
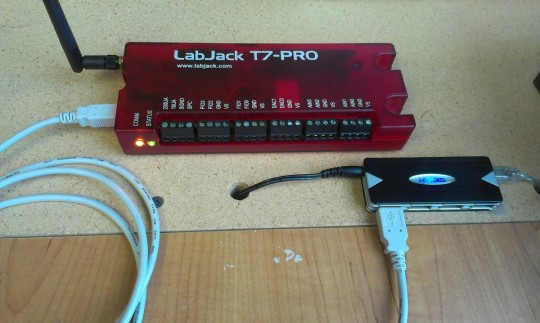
Usually power can be supplied more easily with a wall adapter than with a USB hub. The images below demonstrate how to supply power without a computer.
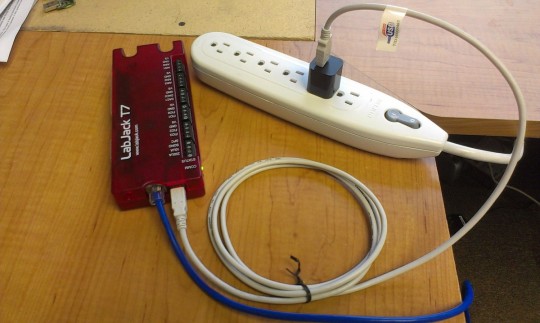
Connect the T-series device's USB plug to a powered USB port capable of ~500mA or more. The image above demonstrates a standard 5V USB adapter commonly used for charging cell phones and other battery powered peripherals. Also connect the Ethernet jack to a compatible Cat5 (or better) Ethernet cable, and ensure proper connection to either a hub or router on your network.
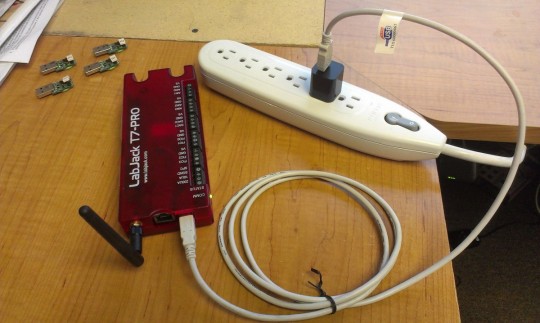
Connect the T7-Pro's USB plug to a powered USB port capable of ~500mA or more. The image above demonstrates the 5V adapter. Once powered, make sure that it is in range of your wireless router/hub.
Configuring Static IP
To make connecting to networks easy, computers typically obtain an IP address automatically using the DHCP protocol. To connect a LabJack directly to a computer via an ethernet connection, additional steps are required. Here are a few good step-by-step guides for each platform:
Windows
Static IP Configuration: Windows
Mac OS
Static IP Configuration: Macintosh
Linux
On Linux, there are several options, the article How to configure a Static IP in Linux and Unix" is a good start. On select platforms, the ifconfig or ip commands will be useful.