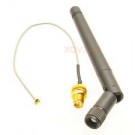
7.0 WiFi (T7-Pro only) [T-Series Datasheet]
Communication Protocol: Modbus TCP
Connector Type: Female RP-SMA
Transceiver: 2.4 GHz 802.11 b/g (Compatible with ac, and n routers)
Security: None or WPA2-PSK (WPA2-Personal)
Range: Similar to laptops and other WiFi devices with stock antenna
Max Packet Size: 500 bytes/packet
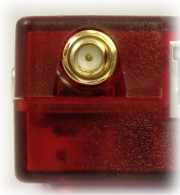
The T7-Pro has a wireless module. Refer to this WiFi and Ethernet tutorial to get started.
DHCP is enabled from the factory, so to get WiFi going from the factory write the desired SSID string (case-sensitive, alphanumeric only) to WIFI_SSID_DEFAULT and the proper password string (also case-sensitive, alphanumeric only) to WIFI_PASSWORD_DEFAULT. Then write a 1 to WIFI_APPLY_SETTINGS and watch the status codes. If you get back code 2900 the WiFi chip is associated to your network, and you can then read the assigned IP from WIFI_IP. Find more details and troubleshooting tips in the WiFi Troubleshooting App Note.
Data Speed: It's possible to get data faster on a T7-Pro using its Ethernet interface instead of its WiFi interface, both for command response and streaming modes. Wireless bridges and access points do not introduce a speed bottleneck, so a bridge is a good way to get fast wireless data from any T-series device. See the Convert Ethernet to WiFi App Note for setup information.
Network Requirements
As noted above, the T7-Pro's WiFi module connects to a standard WiFi network. It needs to be 2.4 GHz 802.11 b/g with WPA2-PSK security or no security. If your existing WiFi does not match that there are a couple of easy options:
Add another access point to create a new WiFi network for your T7-Pros.
Use the Ethernet connection on the LabJack with an Ethernet<->WiFi bridge. See the Convert Ethernet to WiFi App Note. This solution also provides higher performance than the built-in WiFi.
Port
The T7's WiFi module responds to connections or packets on port 502 for both UDP and TCP.
"But I Don't Know How To Speak WiFi?"
Don't worry, the LJM Library takes care of the WiFi details. You just make our Open call to get a handle to a particular device (e.g. HandleA), and then make simple calls such as eReadName(HandleA, "AIN0") which returns the voltage from analog input 0. We have examples for many development environments and even some simple ready-to-run software.
Config (_DEFAULT) Registers
Use the following _DEFAULT registers to configure WiFi:
These registers can also be read, except WIFI_PASSWORD_DEFAULT. Configure the WiFi network configurations in Kipling software.
These _DEFAULT registers are non-volatile. Whatever value you write to a _DEFAULT register will be retained through a reboot or power-cycle. New values written to these _DEFAULT registers are not applied until power-up or until a 1 is written to WIFI_APPLY_SETTINGS.
The network name and password must be alphanumeric. Both are also case-sensitive.
Status Registers
Use the following read-only registers to read the status of WiFi:
Config (_DEFAULT) vs. Status Registers
Example: If you write WIFI_IP_DEFAULT="192.168.1.208" (you actually write/read the 32-bit numeric equivalent—not an IP string), then that value will be retained through reboots and is the default IP address. If DHCP is disabled, this will be the static IP of the device and what you get if you read WIFI_IP. If DHCP is enabled, then a read of WIFI_IP will return the IP set by the DHCP server.
Power
The following registers configure WiFi power:
Examples
Read IP Example: To read the wireless IP address of a device, perform a Modbus read of address 49200. The value will be returned as an unsigned 32-bit number, such as 3232235691. Change this number to an IP address by converting each binary group to an octet, and adding decimal points as necessary. The result in this case would be "192.168.0.171".
Write IP Example: To change the Wireless IP Address of a device, perform a Modbus write to address 49250. The IP address must be passed as an unsigned 32-bit number, such as 3232235691. Change this IP address "192.168.0.171" by converting each octet to a binary group, and sticking them together.
Antenna Details
The T7-Pro ships with a very common RP-SMA 2.4 GHz antenna similar to the W1030 or A24-HASM-450 from Digikey, or search Amazon for "rp-sma" to find plenty of options. To put an antenna further away from the T7-Pro you can use any standard male-female RP-SMA WiFi extension cable.
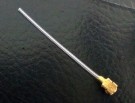
The connection to the WiFi module on the T7-Pro PCB is made via a snap-on/snap-off ultra miniature coaxial connector called male U.FL (aka AMC, IPEX, IPAX, IPX, MHF, UMC or UMCC). The normal T7-Pro uses a U.FL to bulkhead RP-SMA cable with a length of 140mm, similar to the Taoglas Limited CAB.622, Emerson 415-0100-150, Laird 1300-00041, Amphenol 336306-14-0150, or Amphenol 336306-12-0150.
To search for U.FL to RP-SMA cable options at Digi-Key, go to the "Cable Assemblies => Coaxial Cables (RF)" section, and filter by Style = "RP-SMA to IPX" or "RP-SMA to MHF1" or "RP-SMA to UMC" or "RP-SMA to UMCC". Then look at the picture and make sure it looks correct, as the application of the terms "male" and "female" are not totally standardized.
T7-Pro-OEM ships with a simple 30mm U.FL whip antenna such as the Anaren 66089-2406.
WiFi Range
Base T7 Antenna
The WiFi range on the T7 is typical for a modern WiFi device. In direct line-of-sight with the router, it's possible to get a decent connection at 100m. The table below shows signal strength at varying distances with a stock T7 antenna, and a simple WiFi router. Both the T7 and the router were positioned 3ft off of the ground, with direct line-of-sight.
During testing, it was noted that the T7 had slightly better WiFi range than an HTC One V cell phone. The WiFi signal is spotty at RSSI lower than -75dBm, and the connection will cut off entirely around -80dBm. Note that 90° antenna orientation was used in testing above. That is to say, keep the antenna in the fully bent upright position, don't try to point it at the router, or accidentally leave it at 45° bent. At 45° bent, or directly pointed towards the router, the signal strength is reduced by about 5dBm.
Note that the RSSI value you can read (WIFI_RSSI) is only updated when WiFi communication occurs. That is, if you talk to the T7 over USB to read the RSSI value, you will just get the value from the last WiFi communication that occurred.
OEM Whip Antenna
The OEM whip antenna is a short segment of wire, only 30mm in length. This whip antenna provides an inexpensive solution for adding WiFi to an OEM board, without the need to figure out mounting of a bigger antenna. The signal strength of a 30mm whip antenna is on average 11dB less than that of the stock antenna. The table below demonstrates the 30mm antenna signal strength at various distances.
Improve signal strength
The first step to improve the signal strength at large distances is to ensure direct line-of-sight. Beyond that, the next best thing is to elevate the transmitter and receiver antennas. Even an elevation of 1m off the ground helps quite a bit. Be sure to consider the probability of lightning strikes if the antenna is high relative to the surroundings.
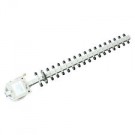
The next step to improve signal strength is to use a directional WiFi antenna. Directional antennas improve range substantially, such that even a homemade solution can increase range to fifteen times that of a non-directional antenna. If you need something to work at 500m, it's possible to buy a simple yagi antenna for $60 USD approx.
Network Schemes
Figure 1 demonstrates a basic network diagram where the T7-Pro is connected to the "Office WiFi" network. The T7-Pro can be controlled by either host option (1 or 2). For much more information on Ethernet and WiFi networking see the Basic Networking & Troubleshooting App Note.
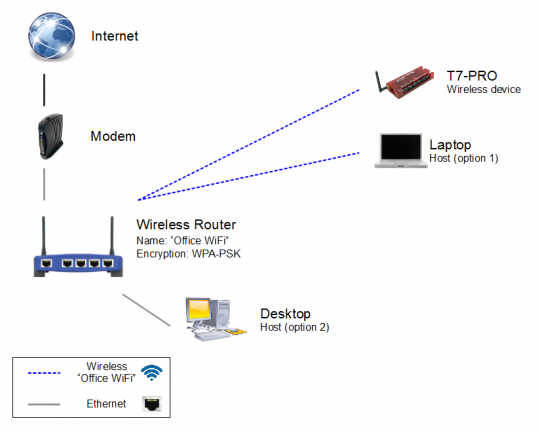
Figure 1. Most common configuration for a home, or small office network.
UDP Discovery-Only Mode
Firmware minimum: 1.0284
If your network has Modbus UDP packets broadcast on port 502, you can enable discovery-only mode. See the Ethernet page for more details.
Use WIFI_UDP_DISCOVERY_ONLY to enable/disable discovery-only mode until the device is power-cycled:
Use the _DEFAULT register version to set the startup behavior for discovery-only mode:
Troubleshooting
See the Basic Networking & Troubleshooting App Note and WiFi Troubleshooting App Note.

