
Overview
The T8 excels at thermocouple measurements with its 24-bit analog to digital converters (ADCs), built-in amplification, and channel-to-channel isolation. The 24-bit sigma-delta ADCs also filter 50/60 Hz noise, which is a common problem in thermocouple applications. A single T8 can measure up to 8 thermocouples.
See Selecting the Right Hardware to compare solutions for 8+ thermocouple measurements.
Resolution
The voltage range for a type K thermocouple is -10.8 mV at -270 °C to +54.89 mV at 1372 °C. This equates to an output of roughly 40 µV/°C. The corresponding temperature resolution when using a T8 is described in Table 1.
Table 1: Approximate Type K Thermocouple Measurement Resolution Using the T8.
|
Resolution Index |
Noise Free (°C) |
Effective (°C) |
|---|---|---|
|
8 |
0.3 °C |
0.05 °C |
|
16 |
0.075 °C |
0.0125 °C |
In-depth Breakdown: From Appendix A-3-3-2 of the T8 User's Guide, the typical device resolution at resolution index 8 and ±0.15V range is ≈12 μV noise-free and 2.0 μV effective.
12 µV / 40 (µV/°C) = 0.3 °C noise-free from a type K thermocouple.
At resolution index 16 the device resolution is ≈3.0 μV noise-free and 0.5 μV effective.
Most temperature samples (1 standard deviation) are expected to fall within the effective resolution value.
Real thermocouple signals could be affected by external noise sources that result in worse resolution than the values detailed above.
Air temperature tends to fluctuate naturally. What looks like noise in a thermocouple measurement could be real temperature changes.
Accuracy
What's the difference between resolution and accuracy? See the Resolution and Accuracy App Note.
Table 2: Approximate Type K Thermocouple Measurement Accuracy Using the T8.
|
Range Setting (V) |
Accuracy (°C) |
Temperature Range (°C) |
|---|---|---|
|
± 0.075 V |
±0.475 °C |
-270 to 1372 °C |
|
± 0.036 V |
±0.333 °C |
-270 to 860 °C |
In-depth Breakdown: From Appendix A-3-3-1 of the T8 User's Guide, the T8 is calibrated to an absolute accuracy of ±19 µV at the ±0.075 V range. This value corresponds to around ±0.475 °C for a type K thermocouple (19 µV / 40 µV/°C).
Higher accuracy can be achieved by using a higher T8 range setting. Note that this could limit the measurable temperature range. The ±0.036 V range setting has an accuracy of ±13.3 µV. This value corresponds to around ±0.333 °C for a type K thermocouple (13.3 µV / 40 µV/°C).
There are other sources of error in a thermocouple system. In particular, any error in cold junction temperature measurement is reflected as error in the thermocouple temperature.
Tutorial: T8 and Type K Thermocouples in Kipling
Follow these instructions to connect a Type K thermocouple to a LabJack T8 and acquire readings using Kipling. The “Going Further” section provides guidance for other software options.
1. Go Through the T8 Quickstart Tutorial.
2. Connect the Thermocouple to an Analog Input.
This tutorial will use AIN0 on the T8. Connect the thermocouple as shown below:
-
Thermocouple+ to AIN0+
-
Thermocouple- to AIN0-
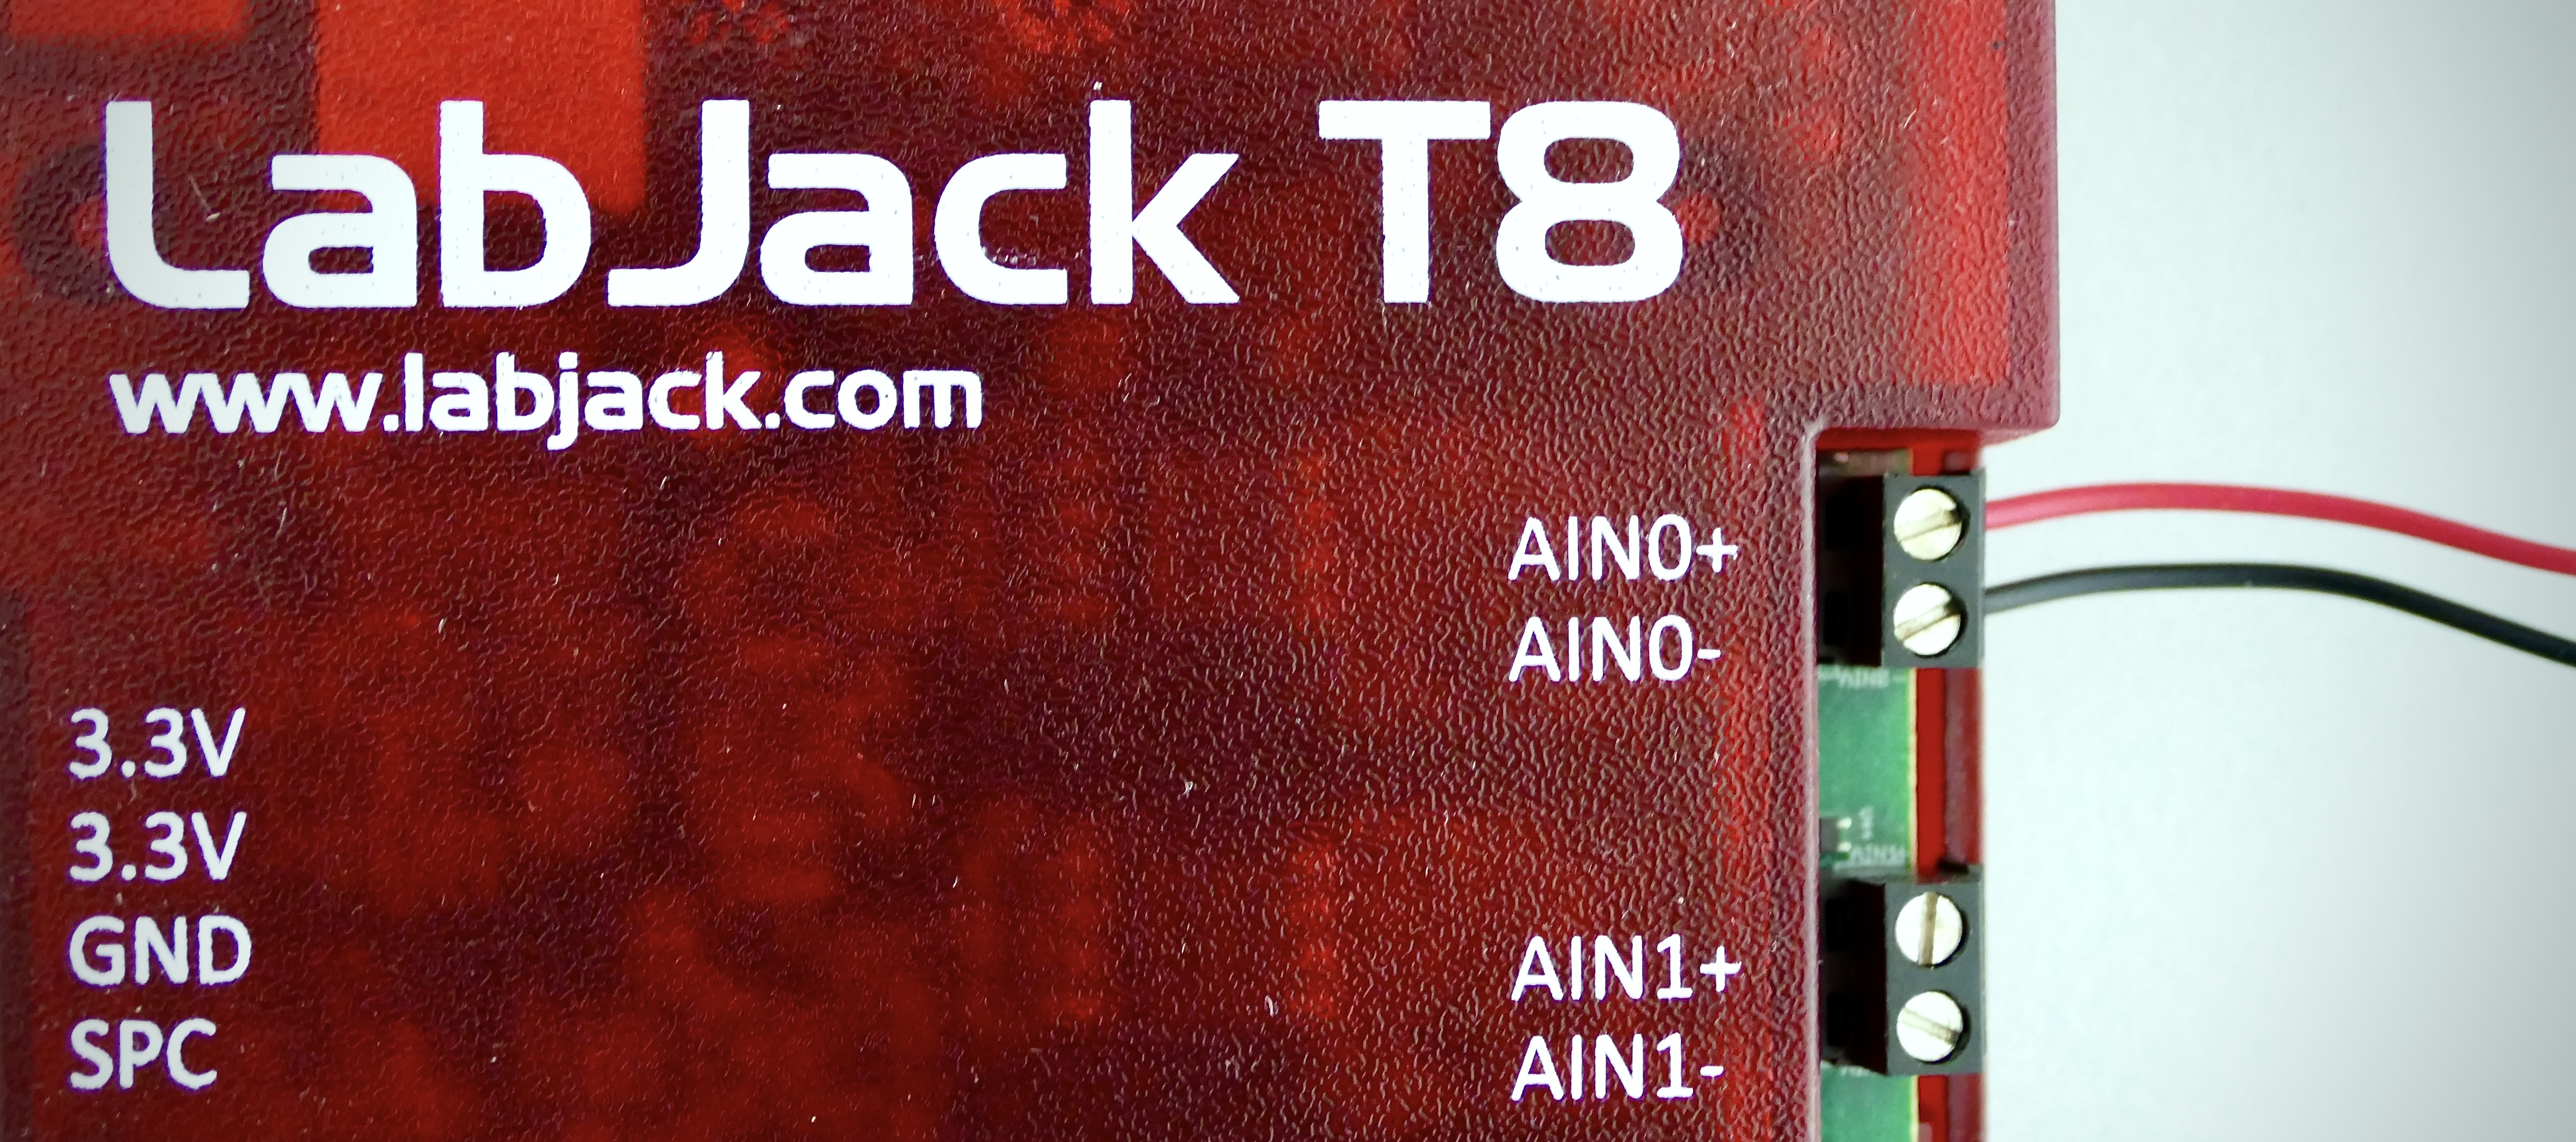
You may have noticed that other LabJack devices such as the T7 require you to refer thermocouples to device GND, often by connecting a resistor from the AIN to GND. This ground reference connection is not required on the T8 due to the isolated analog input design.
3. Run Kiplingand Connect to the T8.
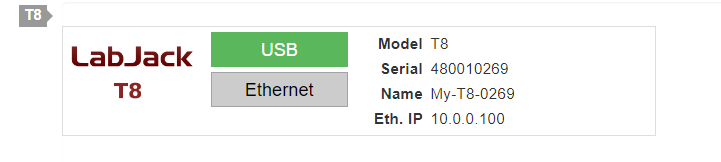
Connect the T8 to your computer via USB, then click Refresh Devices in Kipling. Click the Green USB button to open the T8.
4. Configure AIN0 in Kipling.
The AIN can be configured in Kipling by using the Analog Inputs tab wizard, or by manually writing device registers using the Register Matrix tab.
Wizard Configuration (Easiest Method)
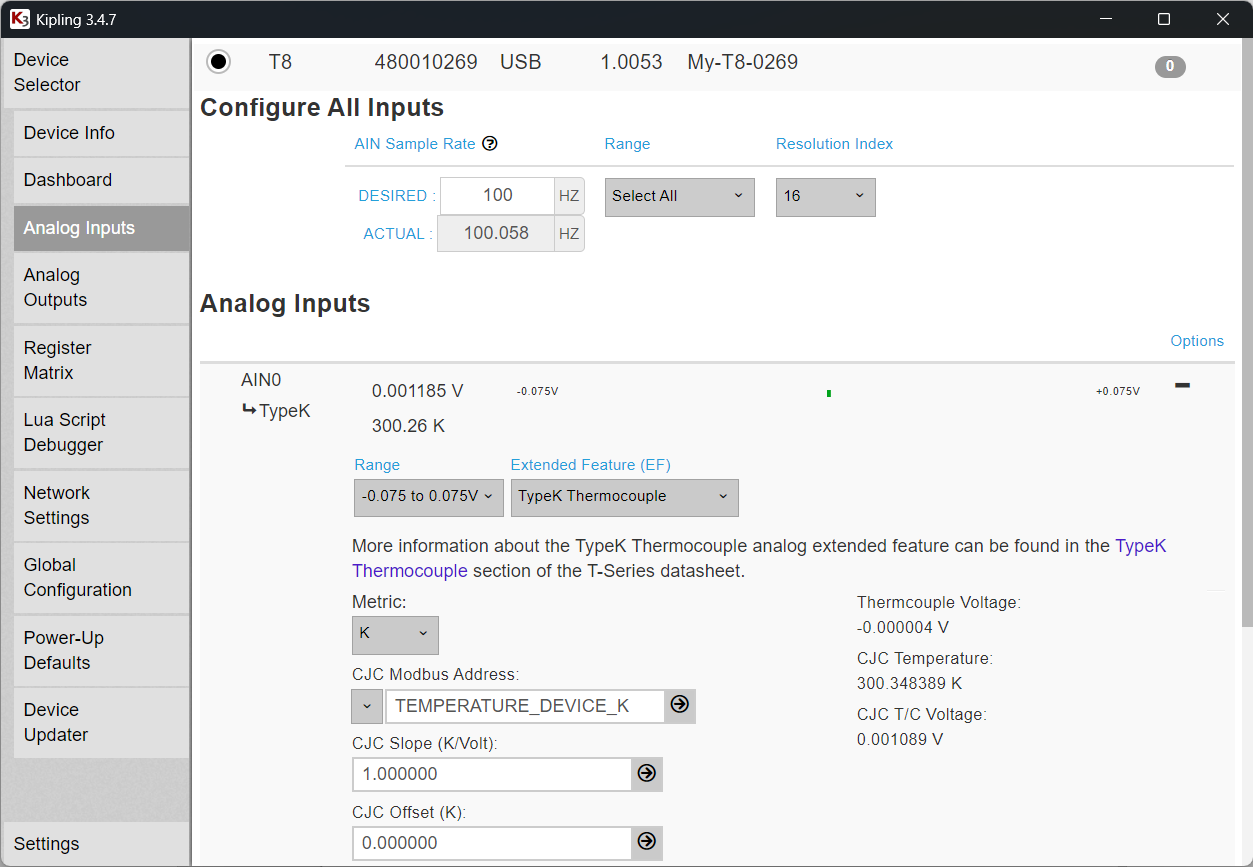
The simplest way to configure AIN is using the wizard in Kipling. Go to the Analog Inputs tab, press the + button for AIN0, and set Extended Feature (EF) to TypeK Thermocouple. Set Range to -0.075 to 0.075 V.
We recommend using the smallest range setting that will work for your measurements. The ±0.075V range setting is suitable for the full temperature range of most thermocouple types.
Register Configuration (Alternate Method)
This method is a good reference point for programmatic AIN configuration. The AIN can be configured programmatically by reading and writing the same registers used in this guide.
-
Navigate to the Register Matrix tab in Kipling.
-
Add
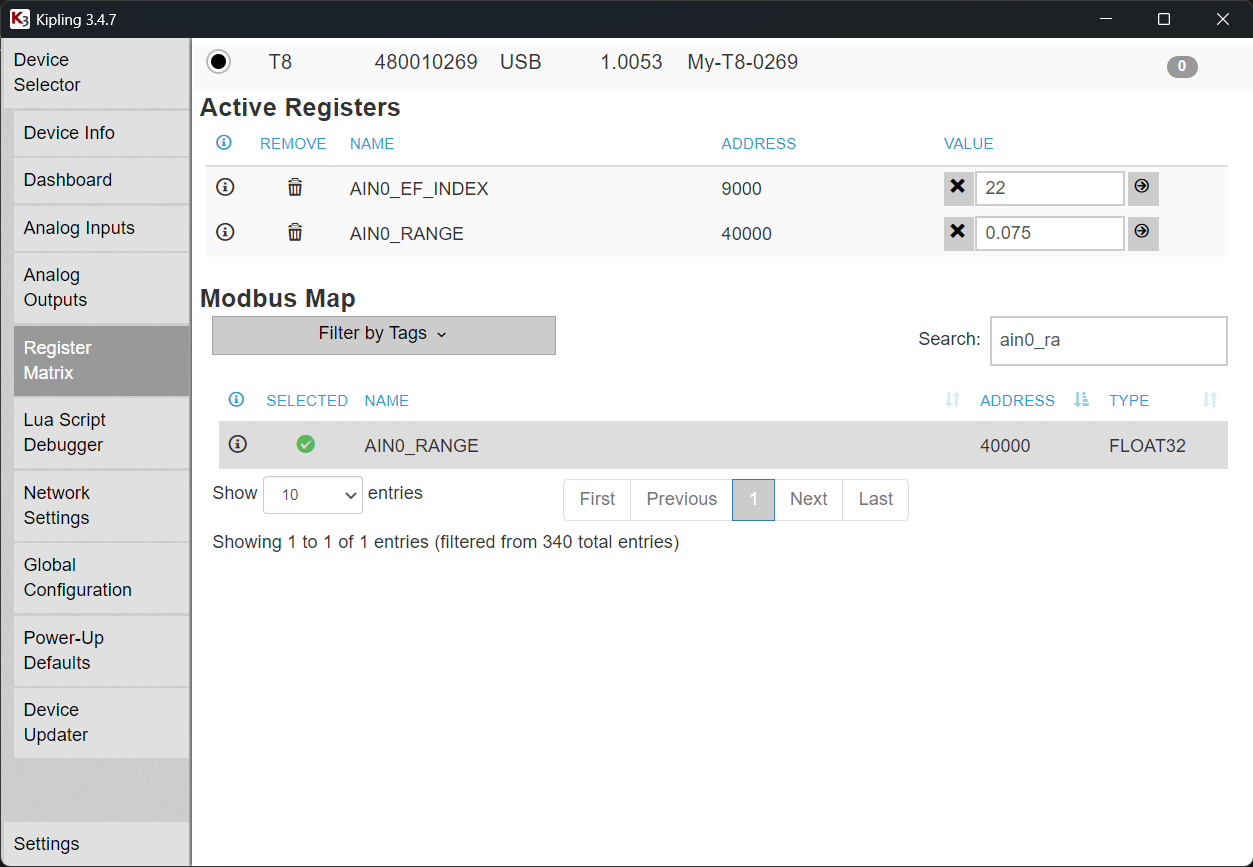
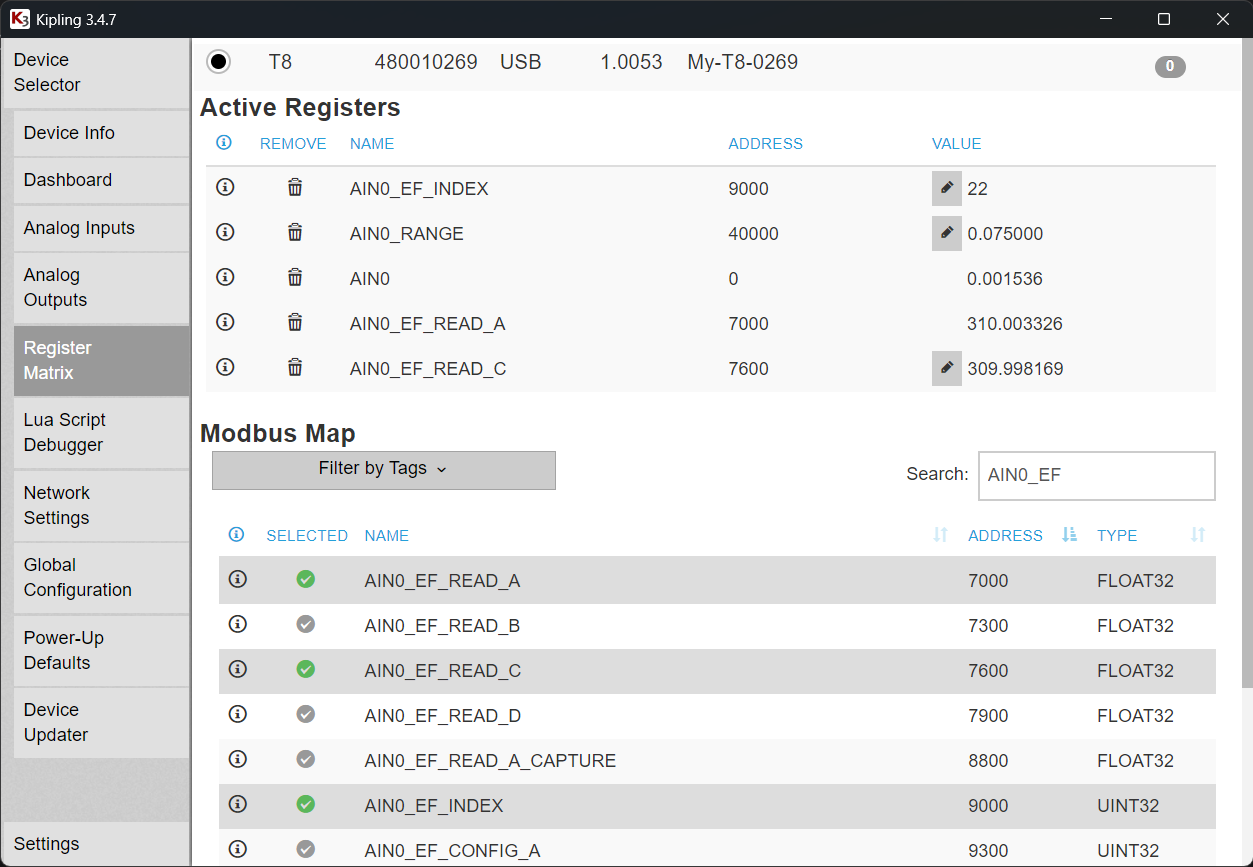
AIN0_RANGEandAIN0_EF_INDEXto the active registers list. To do so, search for each register using the search bar. When the register appears in the search results, click on the check mark to the left of the register name to add it to the active register list. -
Set
AIN0_RANGEto0.075to use the ±0.075 V range setting and setAIN0_EF_INDEXto22to configure the type K thermocouple measurement feature (AIN_EF). To do so, click on the "write mode" button for bothAIN0_RANGEandAIN0_EF_INDEXin the active registers section, update each register value, then click the “write” button for each register. The “write mode” button looks like a small pencil icon under theVALUEcolumn.
There are additional configurations available by writing AIN#_EF_CONFIG registers as outlined in the Thermocouple AIN_EF Documentation, but the default settings work for measurements in Kelvin, using the internal temperature sensors for CJC.
5. Read the Thermocouple Measurement.
Thermocouple measurements can be read in Kipling by using the Analog Inputs tab wizard, or by reading registers in the Register Matrix tab.
Wizard Method
You should see the thermocouple temperature reading just below the AIN0 voltage in the Kipling Analog Inputs tab. As an example, Figure 3 above shows an AIN0 voltage of 0.001185 V and thermocouple temperature of 300.26 K. This measurement was taken at room temperature on a hot summer day, and the value was as expected.
Register Matrix Method
Add AIN0, AIN0_EF_READ_A, and AIN0_EF_READ_C to the active registers list in the Register Matrix tab of Kipling. These return the raw thermocouple voltage, the thermocouple temperature, and the CJC (cold junction compensation) temperature, respectively.
Figure 5 below shows measurements that were taken at air temperature on a hot (high of 312 K) summer day. The temperature units are Kelvin (AIN0_EF_CONFIG_A set to the default value of 0).
Usually the CJC temperature is slightly higher than air temperature due to self heating, unlike what is shown in Figure 5.
6. Troubleshooting Readings.
If you are not sure what temperature to expect or your reading are not consistent with what you expect, see the tests and other guidance provided in the “Wrong Temperature” section of the Thermocouple Troubleshooting page.
7. [Optional] Configure Additional Thermocouples in Kipling.
Repeat steps 2-6 for any additional thermocouples you want to configure on other AIN channels.
8. [Optional] Configure Settings as Power-Up Defaults.
Most AIN settings such as the input ranges and thermocouple measurement features can be saved so that they are automatically applied when the T8 is powered on. To configure power-up defaults using Kipling, go to the Power-Up Defaults tab and follow the instructions on the page to save "Current Device Settings" as the power-up defaults. See Device Configurations in the T-Series Datasheet for more information.
Power-up default settings only apply to device registers and their associated features. These settings are separate from LJLogM. LJLogM settings such as #Channels, Names, etc. are saved automatically when you exit LJLogM.
Going Further
The T8 is compatible with multiple thermocouple types including B, C, E, J, K, N, R, T, and S. For more information, see the Thermocouple AIN_EF section of the T-Series Datasheet. If another thermocouple type is required for your application let us know.
The thermocouple AIN feature (AIN_EF) can be configured programmatically by reading and writing AIN_EF registers, similar to what is described in the “Register Matrix Configuration” sections of the tutorial above.
Software Options
There are four main software options to acquire thermocouple measurements:
-
LJLogM: LJLogM is the simplest logging solution. See the “Log Data with LJLogM” section below.
-
Custom LJM Software: LJM is recommended if you need to create custom software. Programming examples are available on the LJM Example Code page. Registers such as
AIN0_EF_INDEXandAIN0_EF_READ_Acan be written and read using the LJM Single Value Functions or Multiple Value Functions. -
DAQFactory: DAQFactory is more customizable than LJLogM. It may require a small amount of programming, but much less than LJM or Modbus TCP programs. Read through "Device Configuration" and "Linking LabJack Inputs/Outputs to DAQFactory Channels" sections on the DAQFactory for LJM page, then see the example “thermocouple-ain-ef.ctl”.
-
Direct Modbus TCP Communications: LabJack recommends using LJM over direct Modbus TCP communications whenever possible. See the Direct Modbus TCP Getting Started guide.
See the T-Series Software Options page for a full list of software options.
Thermocouples in Stream Mode
It is possible to read thermocouples while using stream mode acquisition, but the configuration is more advanced and it should be avoided whenever possible. The AIN extended features (AIN_EF) are not supported while streaming.
-
Typically the
AIN#andTEMPERATURE#registers are streamed to capture the thermocouple voltage and CJC temperature, respectively. -
The measured thermocouple voltage and CJC temperature can be converted to thermocouple (remote end) temperature using the LJM TCVoltsToTemp function. Note that TCVoltsToTemp is available using scaling equations in LJStreamM.
-
The T8 sub-stream functionality may be required to sample the
TEMPERATURE#registers at the requisite <250 Hz sample rate.
Log Data with LJLogM
LJLogM is a simple solution to log thermocouple measurements. Close Kipling and then open the T8 in LJLogM.
Thermocouple Readings in LJLogM
Set the value of the row0 Names column to AIN0_EF_READ_A. This will configure LJLogM to measure the AIN0 thermocouple temperature in row0, reported in the Value column. Repeat this step for however many thermocouples you configured in Kipling. Be sure to change the # Channels control to reflect the number of channels you want to read in LJLogM. For example, if you set up a second thermocouple on AIN1 you could set the value of row1 Names column to AIN1_EF_READ_A to read the thermocouple temperature in row1. Set # Channels to a value >=2 to read at least the first two channels/rows.
AIN_EF readings will only work in LJLogM if the thermocouple measurement feature is configured for each corresponding AIN channel. See the configuration steps in the section “Tutorial: T8 and Type K Thermocouples in Kipling” above.
Save LJLogM Data to File
Once you see good thermocouple readings in LJLogM, you can start logging data to file by clicking the small Write to File radio button. This will save data as a tab delimited ASCII file with a timestamp in the first column. See the LJLogUD & LJLogM Timestamps page for additional information.